
Affiliate Disclosure
Some links on this page are affiliate links. As an Amazon Associate, we earn from qualifying purchases — at no extra cost to you. We do not buy, test, or physically handle the products we cover; our rankings come from aggregated owner reviews, ratings and expert consensus. Commissions never change our verdicts. How we rank & full disclosure.
Short version: a torque wrench does one job — it tightens a fastener to an exact, manufacturer-specified figure and tells you the moment you get there with a click. Using it correctly comes down to four habits: set the right number from the service manual, pull smoothly and stop at the click, follow the correct tightening sequence, and dial the wrench back to its lowest setting before you put it away. Get those right and you will never again over-crush a drain plug or warp a rotor with a rattle gun. Here is the full walkthrough, safety first.
There is a certain satisfaction to a fastener that is tightened to exactly the right figure — not muscled down until something creaks, not left a half-turn loose, but dialed in. That precision is the whole point of the tool, and it is easier to master than most beginners expect.
Why torque actually matters
Every important bolt on a car is engineered to be tightened to a specific tension, and the torque figure in the manual is how you hit that tension without a lab. Too loose and the fastener can vibrate free — a wheel, a suspension arm, a caliper. Too tight and you stretch the bolt past its yield point, strip threads, crush a gasket, or warp a brake rotor. A torque wrench keeps you in the narrow band where the joint clamps correctly and stays that way. This is not fussy overkill; it is the difference between a repair that holds and one that comes back to bite you.

Step 1: Find the correct spec
Before you touch the wrench, look up the number. Torque specs live in the factory service manual, and common ones (lug nuts, oil drain plug) are often in the owner's manual. Figures are given in lb-ft in the US, sometimes Nm — make sure you are setting the unit your wrench uses. Never carry a number over from a different vehicle; a compact car's lug spec and a full-size truck's are worlds apart. If the spec is a range, aim for the middle. If you cannot find it, stop and confirm before tightening.
Step 2: Set the wrench
On a click-type wrench, unlock the handle, rotate it until the main scale reaches your target, then use the fine scale on the handle to dial in the remainder — the total of the two is your setting. Re-lock the handle so the value cannot drift. Double-check the number against the manual before you start. A wrench set to 80 when you meant 18 will happily over-torque without complaint, so this read-back habit is worth the two seconds every time. Choose a wrench whose range comfortably brackets your job; see the torque wrench buying guide for picking the right size.

Step 3: The correct technique
Run the fastener most of the way down first with a regular ratchet, so the torque wrench only handles the final tightening. Then fit the wrench squarely, grip the center of the handle, and pull slowly and steadily toward you — never a sharp jerk. Keep the pull in one smooth motion in the plane of the wrench, not at an angle. The instant you feel and hear the click, stop. That click is the tool telling you the joint is at spec; continuing past it just over-torques. Do not re-click the same bolt repeatedly "to be sure" — one clean click is the reading.
Step 4: Torque in the right sequence
Multi-bolt parts — wheels, valve covers, anything with a pattern — must be tightened in the correct order, not around the circle. For wheels and most round flanges that means a star / criss-cross pattern, working across to the opposite fastener each time so the part seats evenly. On big jobs, torque in two or three passes: snug everything first, then a middle pass, then the final pass to full spec. Tightening one bolt fully before its neighbors can cock the part and give a false clamp. Slow, even, opposite-to-opposite is the rule.

Never break bolts loose with it
A click-type torque wrench is a tightening-only tool. Cracking a seized fastener loose loads it far beyond the calibrated range and ruins the accuracy you paid for. Use a breaker bar or standard ratchet — or a cordless impact wrench — to break fasteners free and to spin them down, then bring in the torque wrench purely for the final tighten. If you are weighing a breaker bar against power tools for that job, the impact wrench vs breaker bar comparison lays out when each wins.
Storage: the habit that keeps it accurate
Here is the tip owners consistently rate as the most important: before you put a click-type wrench away, dial it back to its lowest setting (not zero — its minimum). That releases tension on the internal spring so it does not take a set and drift out of calibration. Store it in its case, keep it dry, and do not drop it — a hard knock can throw off the reading. With that one habit, a good home wrench stays accurate for years; without it, calibration slides. For heavy or critical use, have it professionally checked periodically.

Where to go next
Master those four habits and the torque wrench becomes the most confidence-building tool in the box. If you are still choosing one, start with the best torque wrench roundup and the buying guide, brush up on drives and sizes with socket set basics, and head back to the garage tools hub for the full toolkit.
Recommended Products
Best for the click wrench most people should buy for lug nuts and general work
- ±4% accuracy in the clockwise direction
- All-steel build, no plastic housing
- Clear dual-range scale, positive click
- Reversible ratcheting head
Why buy it: the wrench owners rate highest for the money — accurate, tough, and the ideal 10-150 ft-lb range for wheels and most chassis work you learn on here.

Best for the cheapest genuinely trustworthy click wrench
- Pre-calibrated to ±4% accuracy
- Hardened chrome-vanadium steel
- Knurled non-slip grip, dual-range scale
- Includes storage case
Why buy it: one of the most-reviewed torque wrenches on the internet — near-identical performance to pricier clickers, and the case makes it easy to store dialed back.
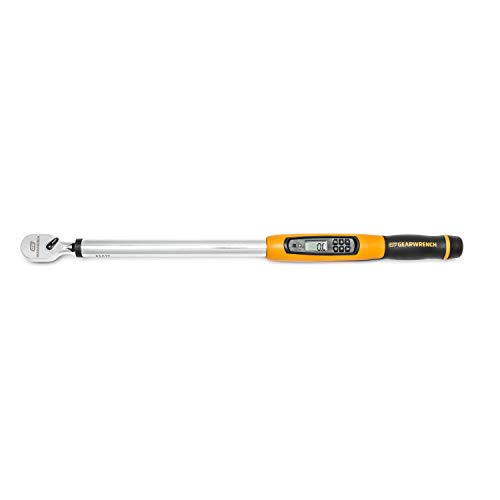
Best for higher-torque work with buzzer, light and vibration alerts
- ±2% CW / ±3% CCW accuracy
- Target Torque Alert: buzzer, LED and vibrating handle
- 72-tooth ratchet, 5° swing arc
- Reads in ft-lb, in-lb, Nm and kg-cm
Why buy it: the electronic pick for suspension and drivetrain torque — you feel and hear the target instead of relying on feeling the click, which helps while you build the habit.

Best for a digital readout with a certificate of calibration
- LCD readout, buzzer + LED flash at target
- Ships with an ISO 6789 calibration certificate
- ±2% CW accuracy
- Peak and track measuring modes
Why buy it: a well-priced digital wrench with a clear screen and the reassurance of a calibration cert in the box — handy when you want to see the exact number, not just hear a click.
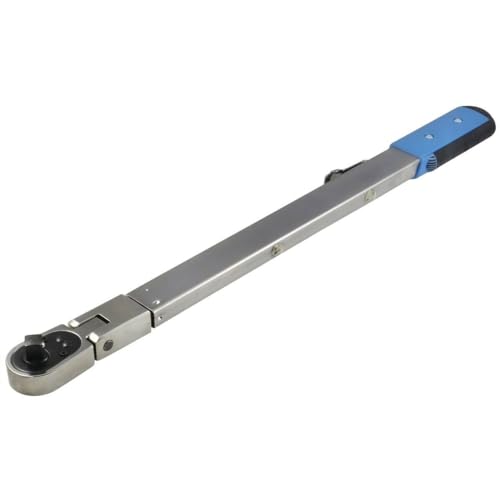
Best for a set-and-forget pro wrench that holds calibration
- Split-beam design — no need to dial back to zero
- Flex head for awkward angles
- Holds calibration longer than click wrenches
- Made in the USA
Why buy it: the pro pick that sidesteps the storage rule entirely — a split-beam you can leave set without losing calibration, and it stays accurate far longer between checks.
Prices are pulled from Amazon and were accurate as of Aug 22, 2026, 6:54 PM EDT. Product prices and availability are subject to change — the live price is shown on Amazon.