
Affiliate Disclosure
Some links on this page are affiliate links. As an Amazon Associate, we earn from qualifying purchases — at no extra cost to you. We do not buy, test, or physically handle the products we cover; our rankings come from aggregated owner reviews, ratings and expert consensus. Commissions never change our verdicts. How we rank & full disclosure.
Short version: Wash and dry the car, work in the shade on a cool panel, spread a thin even coat of wax with a foam pad using light overlapping passes, let it haze until a finger swipe wipes clean, then buff off with a plush microfiber towel flipped often. Thin coats and patience beat thick coats and muscle every time.
Waxing is the part of detailing that looks intimidating and turns out to be the easiest step you do all day — once you stop fighting it. Most people go wrong in the same two places: they slather it on like frosting, and they try to buff it off before it is ready. Get the timing right and the whole car flows like a downhill run — smooth, controlled, no drama. This is the pass everything else has been building toward, so let us walk it corner to corner.
What you need before you start
You do not need a shelf full of gear. A tidy setup keeps you moving and stops you contaminating fresh wax with dirty towels. Here is the honest minimum:
- Your wax of choice — paste, liquid, or spray. Each applies a little differently, and we cover that below.
- A foam applicator pad for paste and liquid, or a clean microfiber for spray wax.
- Two or three plush buffing microfiber towels, ideally 400gsm or higher, so you can swap to a dry one as they load up.
- A clean, dry, decontaminated car. If you have never clayed the paint, do it once before your first wax — you will feel the difference under the pad.
That is it. Skip the gimmicks. A good pad and clean towels matter more than an expensive bottle.
Prep: the part that actually decides your result
Wax does not clean paint — it seals whatever is already there. So if the surface is dirty, you are sealing dirt onto the car and buffing grit across your clear coat. That is how people end up adding swirls with the one step that is supposed to make paint look better.
Wash the car properly, dry it fully with a plush drying towel, and if the paint still feels rough when you glide a hand over it, clay it. A clean panel should feel like glass. Our full guide to waxing mistakes fixed goes deep on the prep errors that show up later as streaks and haze, and it is worth a read before your first attempt.
Paste, liquid, or spray — how each one applies
The core method is the same for all three, but the feel differs and it changes your timing.
- Paste wax is the classic. Load a small amount onto a damp foam pad, and go easy — a coat the thickness of a shadow is all you want. Paste tends to give the warmest, deepest look, and it is the most forgiving on timing.
- Liquid wax spreads faster and thinner, which makes it great for larger cars and beginners. A few small dots on the pad per panel is plenty. Our best liquid car wax guide breaks down the ones we rate for ease and gloss.
- Spray wax is the speed run. Mist it onto one panel at a time, spread with a microfiber, and immediately buff with a second dry towel. There is barely any haze time. It is the least durable of the three but unbeatable for a quick top-up. If you are choosing between the two spray-bottle products in your cabinet, our spray wax vs quick detailer breakdown clears up which does what.
Applying the wax: thin, even, one panel at a time
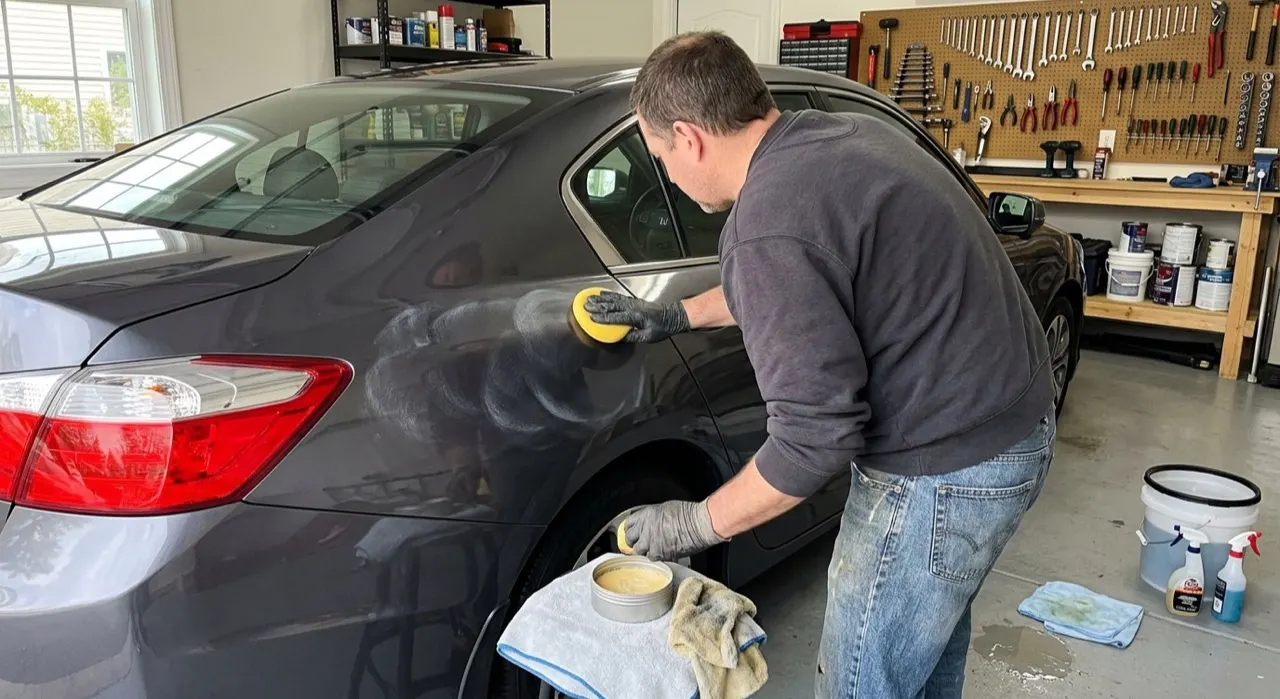
Work panel by panel so nothing hazes before you get to it. On the hood, do it in halves. Spread the wax in light, overlapping passes — some people swear by straight lines, some by circles, and honestly it does not matter as long as the film is thin and even. You are not scrubbing anything in; you are laying down the lightest possible layer.
The single biggest mistake is applying too much. A thick coat does not protect better — wax can only bond a molecular layer or two to the clear coat, and everything beyond that just sits on top waiting to fight you when you buff. If you can see white streaks of wax clearly across the panel, you have used two to three times more than you need. Less product, more coverage.
Keep the applicator clean as you go. If it drags or grabs, it is loading up — fold it to a fresh face or grab a new pad. A dragging pad is how you push haze into the finish.
Letting it haze, then buffing off
Once a panel is coated, leave it alone. The wax needs to haze — go dull and slightly cloudy — as the solvents flash off and the protective layer sets. This is where patience pays. Rush it and the wax is still liquid, so you just smear it around. Wait too long in the sun and it bakes into a stubborn film.
Use the swipe test: drag a clean fingertip across the hazed wax. If it smears, wait. If it wipes clear to shiny paint, you are ready to buff. This test never lies, and it beats staring at a clock.
To buff, take a clean plush microfiber and wipe with light pressure in straight passes. Flip to a dry side of the towel often — a loaded towel just redeposits wax and leaves streaks. Fold the towel into quarters, use each face, then grab a fresh one. Finish each panel with a final light pass and step back to check the reflection in raking light. Streaks show up best at an angle, not head-on.
The order to work around the car
Start at the roof and work down: roof, then hood and trunk, then the upper halves of the doors and fenders, and finally the lower panels. Lower panels collect the most road grime, so leaving them for last keeps that contamination off your fresh applicator for as long as possible. Do the horizontal panels well — they take the most sun and weather, so they benefit most from protection.
Keep wax off unpainted plastic trim, rubber seals, and matte or textured plastic. Dried wax leaves stubborn white residue in those textures that is a pain to remove. If you slip, wipe it immediately with a damp microfiber before it sets. For trim care, that is its own job — a dedicated trim product does it better than wax ever will.
How often to repeat this
A good coat of wax lasts anywhere from six weeks to a few months depending on the product, your climate, and how often the car sees weather and washing. A garaged weekend car holds wax far longer than a daily driver baking in a parking lot. Rather than guess, check our honest reapplication schedule in how often should you wax, which breaks it down by how you actually use the car.
Picking the right wax for the job
The method above works with any wax, but the product still matters for gloss and longevity. Carnauba gives that warm, wet, organic look enthusiasts love, while synthetics last longer and shrug off weather. If you want the full trade-off, read carnauba vs synthetic wax. And when you are ready to actually buy, buyers have put the real contenders through months of real-world use — see our top picks in the best car wax roundup so you are not guessing in the aisle. For everything wax-related in one place, our Car Wax hub links out to every guide we have.
That is the whole run. Wash clean, work cool and in the shade, spread thin, wait for the haze, buff light and flip your towel. Do that and even your first wax will pull a reflection deep enough to make you keep walking back out to the driveway to look at it.
Recommended Products

Best for the longest-lasting protection from a single coat
- Liquid carnauba that lays down thin and even
- Owner-reported protection measured in months, not weeks
- Highest owner rating of the waxes we compared
- A little goes a long way, so a bottle lasts
Why buy it: the pick if you want to wax less often — it goes on easily and its durability is the reason it keeps topping owner recommendations.

Best for fast, beginner-friendly application between full waxes
- Spray-on, wipe-off — the simplest way to add protection
- SiO2 ceramic formula for slick water beading
- Huge owner base, one of the most-reviewed here
- Great as a drying aid after a wash
Why buy it: the easiest entry point — if a paste wax feels like a chore, this spray delivers real protection in minutes and is hard to get wrong.

Best for a forgiving carnauba that wipes off clean on any color
- Pourable carnauba blend that spreads thin
- Wipes away easily without white residue in trim
- Deep wet-look shine, especially on dark paint
- Large, satisfied owner base
Why buy it: the crowd-pleaser — cheap, easy to apply and remove, and forgiving if you leave it a touch too long, which makes it ideal for learning to wax.

Best for enthusiasts chasing the warmest show-car glow
- High-carnauba paste prized for depth of shine
- Buffs off with very little effort
- Long-standing favourite for concours detailing
- Strong owner rating despite the higher price
Why buy it: the treat for a special car — it costs more and protects for less time than a synthetic, but the warmth it adds to good paint is why enthusiasts keep buying it.
Prices are pulled from Amazon and were accurate as of Aug 22, 2026, 6:54 PM EDT. Product prices and availability are subject to change — the live price is shown on Amazon.