
Affiliate Disclosure
Some links on this page are affiliate links. As an Amazon Associate, we earn from qualifying purchases — at no extra cost to you. We do not buy, test, or physically handle the products we cover; our rankings come from aggregated owner reviews, ratings and expert consensus. Commissions never change our verdicts. How we rank & full disclosure.
The number one rule of working under a car is also the one most people skip: you need to know exactly where your jack goes before the wheel leaves the ground. Not roughly. Exactly. A trolley jack placed in the wrong spot can puncture a floor pan, crack a sill, collapse a rocker, or — in the worst case — dump the car off the stands onto you.
The problem is that “check your manual” is good advice that gives people almost nothing to work with, because most owners have never read their manual and wouldn’t recognize a reinforced pinch weld from a fuel line even if they did. This guide fills that gap. It covers the most common vehicle types on American driveways — sedans and hatches, SUVs and 4WDs, pickups, and lowered cars — and explains which lift points are safe, which are conditionally safe, and which will cost you a repair bill.
Cross-reference everything here against your own vehicle’s owner manual. Always. These are general principles, not model-specific instructions.
If you’re new to jacking in general, start with the complete guide to jacking up a car before reading on. If you need help locating your specific jack points, the where are the jack points page covers inspection methods in detail.
Unibody vs Body-on-Frame: Why Chassis Type Changes Everything
Before you touch a jack, you need to know which type of chassis you’re dealing with, because the two types have completely different lift point logic.
Unibody construction is what you find under the vast majority of modern passenger cars, crossovers, and smaller SUVs. In a unibody, the body and frame are a single welded structure — there is no separate ladder-style chassis underneath. The floor, sills, and firewall all contribute to structural rigidity. This means the only engineered, reinforced places to accept a concentrated jack load are the designated pinch welds on the sill flanges and, in some cases, the front and rear subframes. Everything else is unsupported sheet metal that will flex, crease, or buckle under load.
Body-on-frame construction is used in traditional pickups (particularly body-on-frame crew-cabs like older Tacoma or Ranger configurations), large 4WDs (4Runner 70 and 200 Series, Armada, older 4WD), and American-style pickup trucks. Here the body sits on top of a separate steel ladder frame. That frame runs the full length of the vehicle and is designed to carry substantial loads, including jack loads. You can in most cases place a jack directly under the frame rails, the front crossmember, or the solid rear axle housing, giving you far more flexibility and much higher load-bearing capacity.
If you don’t know which type your vehicle is, look it up now. The jacking instructions in your owner manual will reflect the chassis type and should be your primary source.
Sedans and Hatchbacks: Pinch Weld Points and Subframes
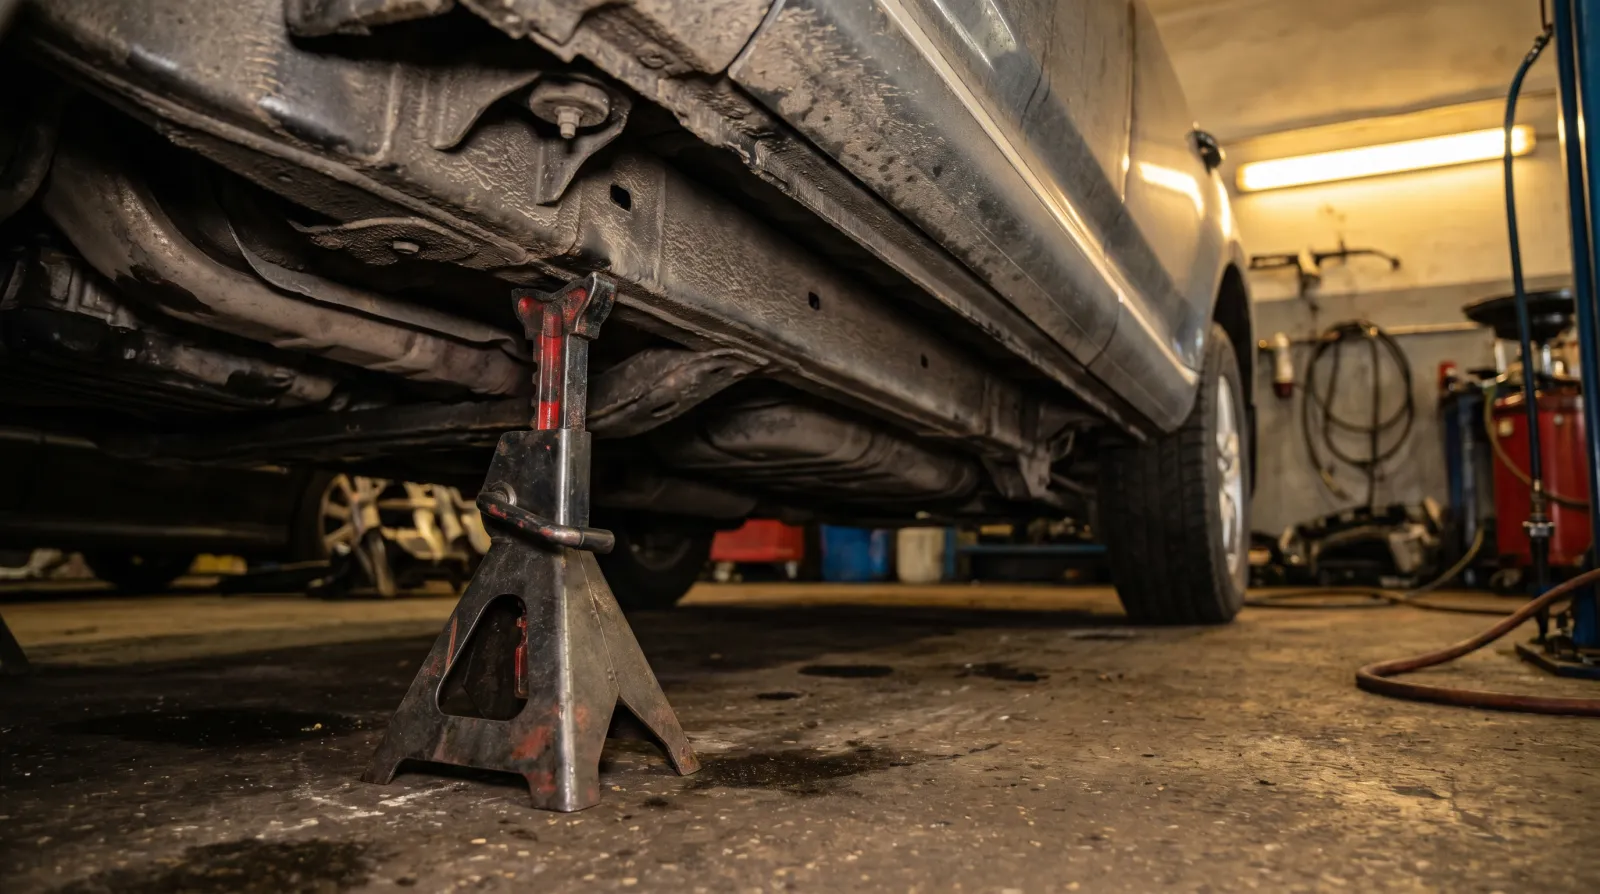
The typical American daily — Corolla, Mazda3, Golf, Camry, Civic, Subaru Impreza — is a unibody car. These have two main jack-point zones: the pinch weld sill flanges and, if your trolley jack is going under the car for bigger jobs, the front and rear subframes.
Pinch Weld Sill Points
Look along the underside of the door sills and you’ll see a folded steel flange running fore and aft — the pinch weld. Manufacturers reinforce specific sections of this flange to accept a jack. Most cars have four designated pinch weld jack points: one forward of the front wheel on each side, one aft of the rear wheel on each side. These are the locations the scissor jack from your trunk is designed to slot into.
The catch: a flat-headed trolley jack saddle placed directly on a pinch weld will damage it over time. Use a pinch weld adapter (a slotted rubber block or steel cup that cradles the flange) every time. They cost almost nothing and will save you from cracked welds and rust entry points that compound over years of lifting.
Place the adapter squarely over the reinforced section, not on thin sheet metal forward or aft of it. Check your manual diagram if you’re unsure — the reinforced section is often marked with a small triangle or notch on the sill itself. Do not place a jack under the middle of the rocker panel between the two designated points. That section is not reinforced and will fold.
Front and Rear Subframe Points for Sedans
If you’re doing a full front or rear lift to set jackstands under all four pinch welds simultaneously, you can use the subframes. The front subframe (sometimes called the front crossmember or front cradle) sits transversely under the engine bay and is a solid fabricated steel member. Center your jack saddle on it, away from any oil lines or mounting brackets. The rear subframe serves the same function at the back of the car, supporting the rear suspension. Both are legitimate lift points on most unibody vehicles but confirm in your manual that they are listed as approved lift points, not just structural members.
Subframe lifts are particularly useful when you need to get all four corners off the ground — front lift on subframe, set stands under rear pinch welds, lower jack, move to rear subframe, set stands under front pinch welds. This is the methodical way to do it safely. Rushing this sequence is how stands end up under unsupported metal.
SUVs and 4WDs: Higher Ground Clearance, More Options
This category covers a wide range of vehicles and the correct approach depends heavily on whether you’re dealing with a unibody crossover (RAV4, CX-5, Tucson, most medium SUVs) or a body-on-frame 4WD (4Runner 70/200 Series, Armada Y62, 4WD on a full frame, Ford Ranger, Isuzu MU-X).
Unibody SUVs and Crossovers
Despite their higher ride height and chunkier looks, crossover SUVs use the same unibody logic as sedans. The pinch weld points on the sill are your primary jack locations, and the front and rear subframes are your lift points for full-axle raises. The advantage over a low sedan is that you have more clearance to position your jack without scraping. The disadvantage is that pinch weld sections on some crossovers are shorter or less clearly marked than on passenger cars — inspect carefully and use adapters.
A common mistake with crossovers is assuming the increased height means you can jack from anywhere underneath. You cannot. The floor pan is still unsupported sheet metal in most locations. Stay on the reinforced points.
Body-on-Frame 4WDs: Frame Rails, Crossmembers, and Axles
Body-on-frame 4WDs give you legitimate options that unibody vehicles simply don’t have. The chassis frame rails that run the length of the vehicle are designed for serious loads. On most Toyota 4Runners, Nissan Armadas, and similar vehicles, you can place a trolley jack directly under the frame rail at a point free from body mounting brackets, electrical harnesses, and fuel or brake lines. The frame rail is typically a 75–100 mm square-section or C-section steel member — unmistakable once you’re looking for it.
The front crossmember (the transverse steel member at the very front of the chassis, often just behind the skid plate) is a solid lift point for raising the front axle. Center the jack here for a two-wheel front lift. For rear two-wheel lifts, use the rear crossmember if your vehicle has one, or the solid rear axle housing.
Always confirm these points in your manual, particularly on newer body-on-frame vehicles where brake lines and electronic sensors may be routed in unexpected locations along the frame.
Pickups: Body-on-Frame Logic with One Key Exception
Modern crew-cab pickups — Tacoma, Ranger, BT-50, Colorado, Triton — are body-on-frame vehicles. The approach is similar to body-on-frame 4WDs: use the frame rails for side lifts, the front crossmember for front-axle work, and the solid rear axle housing for rear lifts on models with a live rear axle.
The rear axle lift deserves specific attention. On pickups with a solid (non-independent) rear axle, you can position a trolley jack directly under the center of the differential housing to lift both rear wheels simultaneously. This is a legitimate and commonly used technique for brake and wheel work. It requires a jack with adequate capacity — see the tonnage section below — and you must ensure your jack saddle is centered squarely on the diff housing, not on a flange, breather fitting, or drain plug. Place jackstands under the frame rails on both sides before going under the vehicle.
The exception: some newer pickup models have independent rear suspension (IRS). On IRS pickups, jacking from the diff/center section lifts the differential but the rear wheels may not come off the ground the same way. Check your configuration before assuming a solid-axle technique applies.
Jacking from the Differential: When It’s OK and When It’s Not
This is one of the most commonly searched questions in DIY car maintenance, and the answer has a frustrating amount of nuance.
When it is acceptable: On vehicles with a solid rear axle (most traditional pickups, body-on-frame 4WDs, and some older sedans with a live axle), the differential housing is a solid, cast-iron or cast-aluminum center section connected to both axle tubes. The entire assembly is one rigid unit. Jacking from the center of the diff casing lifts the entire rear end cleanly and is a technique used in workshops daily. The same applies to front solid axles on some older 4WDs.
When it is not acceptable: On vehicles with independent rear suspension (IRS) — which includes almost every modern sedan, hatch, crossover, and many newer pickups — there is no single rigid connection between both rear wheels. What you’re looking at in the center of an IRS drivetrain is the rear diff housing, which is attached to the subframe, not to a solid axle. Jacking from it lifts only the differential and subframe; the rear wheels may not leave the ground symmetrically and you risk placing the vehicle in an unstable, asymmetrical lean. More critically, the diff housing on an IRS vehicle is not designed to accept concentrated jack loads from below in the same way a solid axle diff is.
The reliable test: if both rear wheels move together as a single rigid unit when you push down on one, you likely have a solid axle. If they move independently, you have IRS. Confirm in your manual.
Lowered Cars: The Problem Nobody Warns You About
A lowered car is not just a jacking inconvenience — it fundamentally changes which equipment you need and which techniques are safe. The full breakdown is on the lifting a lowered car page, but here are the key points that apply to jack point selection specifically.
The challenge with lowered vehicles is two-fold. First, ground clearance is reduced to the point where a standard trolley jack head may not fit under the pinch weld or subframe point without first driving the car onto ramps or low-profile boards. Second, aftermarket suspension components — coilovers, lowering springs on stock struts — may position the chassis differently relative to the factory jack points. The reinforced pinch weld positions don’t move, but reaching them safely may require a low-profile trolley jack (entry heights of 85–100 mm rather than the standard 150 mm).
Do not attempt to wedge a standard-profile jack under a lowered car on a flat surface by tilting it. This puts lateral load on the jack saddle and creates an unstable base. Either use low-profile equipment or get the car up on ramps first to give you clearance.
The jack point locations themselves — pinch welds, subframes — do not change on a lowered street car. What changes is how you get the jack there safely.
Front vs Rear Subframe Lift Points: What You Need to Know
Subframes are chassis members separate from the main body shell that carry suspension and drivetrain loads. Most modern unibody vehicles have both a front and rear subframe, and both can serve as jack points for two-wheel axle lifts, with caveats.
Front subframe: Typically a welded steel cradle or crossmember that spans the width of the engine bay below the engine, carrying the engine mounts, front suspension lower arms, and steering rack. It is a legitimate front-axle lift point. Center the jack saddle on the subframe body itself, not on any attached bracket, bolt, or line. Some front subframes have a flat, horizontal center section that is clearly designed for jack contact. Others are more complex in shape — if there is no obvious flat center section, use the frame rails instead.
Rear subframe: On rear-wheel-drive and all-wheel-drive vehicles with independent rear suspension, the rear subframe carries the rear diff, rear suspension arms, and driveshaft. It is a lift point for the rear axle but requires the same care: center the saddle on the subframe body, avoid brackets and lines, and confirm in the manual that it is listed as an approved lift location.
A note on subframe material: some vehicles — particularly European brands and certain Japanese sports cars — use aluminum subframes for weight reduction. Aluminum is more sensitive to concentrated point loads than steel. Use wide saddle adapters or a wooden pad on the jack head to spread the load and prevent local deformation.
Matching Jack Tonnage to Your Vehicle’s Weight
A jack rated below the load you’re placing on it is not a theoretical concern — it is how hydraulic seals fail, cylinders crack, and cars fall. Getting tonnage right matters.
The relevant number for jack selection is your vehicle’s curb weight: the mass of the vehicle ready to drive, without passengers or cargo. You can find this on the door jamb sticker (usually inside the driver’s door) or in the owner manual. It is not the same as GVWR (Gross Vehicle Weight Rating), which is the maximum the vehicle is rated to carry including payload and passengers. GVWR matters when you’re loading the vehicle; curb weight is what you’re lifting when the car is empty.
The standard guidance is that your jack should be rated to at least three-quarters of the vehicle’s curb weight for a two-wheel lift, and the full curb weight for a four-wheel lift using a single jack under a crossmember. In practice:
- Small sedan or hatch (Corolla, Mazda3, Civic): curb weight typically 2,640–3,190 lb. A 2-ton trolley jack is adequate and common.
- Medium SUV or crossover (RAV4, CX-5, Tucson): curb weight typically 3,300–3,960 lb. A 2-ton jack is on the edge; a 3-ton jack is the correct choice.
- Large body-on-frame 4WD (4Runner 200, Armada Y62): curb weight typically 5,280–5,940 lb. A 3-ton jack is the minimum; a 4-ton or 5-ton is safer and more stable at full extension.
- Crew-cab pickup (Tacoma, Ranger, Colorado): curb weight typically 4,180–4,840 lb. A 3-ton jack for most lifts; 4-ton for lifting from the diff with the bed loaded.
Jackstands must match or exceed the jack rating. Never use a 2-ton stand under a vehicle that required a 3-ton jack to lift. And never, under any circumstances, rely on a jack alone to support a vehicle you are working under. The jack lifts the car; the stands hold it. Those are two different jobs and both require rated equipment.
Universal Rules That Apply to Every Vehicle Type
Regardless of whether you’re under a lowered hatch or a body-on-frame 4Runner, these rules do not change:
- Always confirm jack points in the owner manual before lifting. General guidance covers 95% of situations; your manual covers your specific vehicle.
- Work on firm, level ground. A sloped driveway is not an acceptable work surface. Concrete is strongly preferred over asphalt, which can deform under point loads.
- Engage the parking brake and chock the wheels that stay on the ground. Both. Every time.
- Never use a jack as a stand. Jack it up, set the stands, lower the vehicle onto the stands, then go under. In that order.
- Check stand positioning before committing weight. Give the car a firm push front-to-back before going under to confirm the stands are stable and not rocking.
- Rated equipment only. A timber offcut, a stack of bricks, or a makeshift pad is not a jackstand. Use rated, undamaged equipment every time.
The jacking up a car pillar guide covers the full safe-lift procedure including stand positioning, chock placement, and how to work around flat concrete and camber. Read it before your first lift if you haven’t already.
Recommended Products
We aggregate owner reviews rather than test tools ourselves. Match the jack tonnage to your vehicle’s curb weight (on the driver’s door-jamb sticker), and always pair the jack with rated stands — the jack lifts the car, the stands hold it. Confirm your jack points against your owner manual before every lift.
Best for sedans, crossovers and lowered cars — light to move, low enough to slide under
- 3-ton rating covers most cars and medium SUVs
- Low-profile saddle reaches pinch welds and subframes
- Aluminum body is easy to wheel around the car
- Strong owner rating
Why buy it: the do-most jack — enough capacity for the majority of cars and a low saddle that reaches factory jack points without ramps.

Best for heavier daily use where weight is no object and price matters
- 3-ton steel build at a low price
- Robust for frequent garage use
- Widely available and supported
- Heavier to move than aluminum
Why buy it: the budget workhorse — 3 tons of steel for the money if you are not carrying it far.

Best for lowered cars where a standard jack saddle will not fit under the sill
- Very low entry height for reduced ground clearance
- Rapid-pump lift to save strokes
- 3-ton capacity
- Reaches pinch welds without boards or ramps
Why buy it: the answer to the lowered-car problem — a genuinely low saddle so you are not wedging a standard jack under at an angle.

Best for every lift — the jack raises the car, stands hold it
- 3-ton pair, double-locking ratchet
- Place under frame rails or reinforced points
- Huge, trusted owner base
- Never work under a car on the jack alone
Why buy it: non-negotiable safety gear — match or exceed your jack rating and always set these before going under.
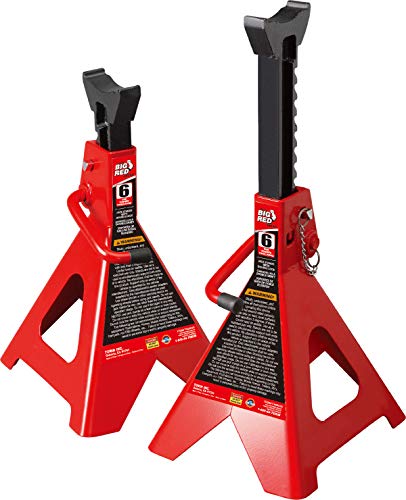
Best for body-on-frame 4WDs and crew-cab pickups above 5,000 lb
- 6-ton pair for heavy vehicles
- Double-locking for extra security
- Stable at greater height
- Good rating across thousands of reviews
Why buy it: the stands for heavy trucks and 4WDs, where a 3-ton stand is undersized for a safe, stable hold.
Prices are pulled from Amazon and were accurate as of Aug 22, 2026, 6:54 PM EDT. Product prices and availability are subject to change — the live price is shown on Amazon.