
Affiliate Disclosure
Some links on this page are affiliate links. As an Amazon Associate, we earn from qualifying purchases — at no extra cost to you. We do not buy, test, or physically handle the products we cover; our rankings come from aggregated owner reviews, ratings and expert consensus. Commissions never change our verdicts. How we rank & full disclosure.
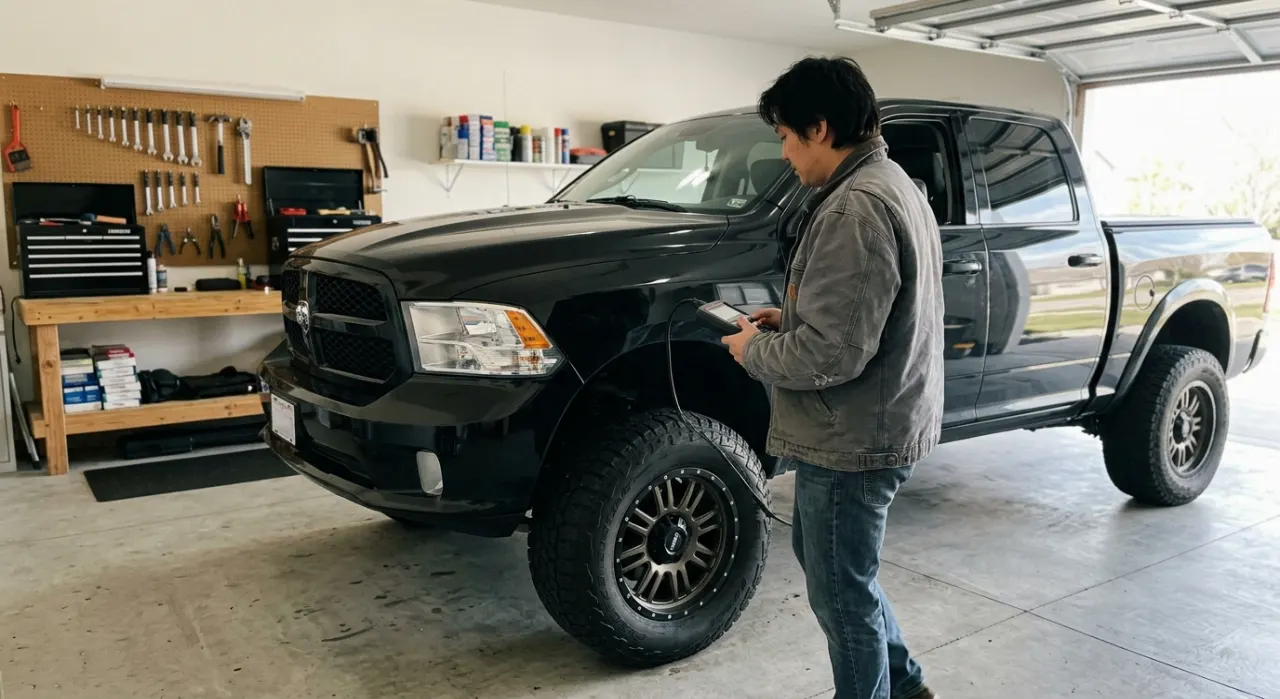
Your check engine light just came on and you want to know what it means before you drop the car at a shop. Good instinct. Reading an OBD2 code yourself takes about five minutes, costs nothing if you borrow a scanner, and gives you real information instead of guesswork. This guide walks you through every step in plain language.
Not sure what OBD2 actually is? Start with What Is OBD2? A Plain-English Explainer first, then come back here. Otherwise, let’s get into it.
What You Need Before You Start
You need two things:
- A car made in 1996 or later — OBD2 is mandatory on all vehicles sold in the US from 1996 onward. Most JDM imports that were re-registered in the U.S. after that date also comply, though some grey-market imports have quirks (more on that below).
- An OBD2 scanner — A basic code reader starts around $25. A Bluetooth adapter paired with a free app works just as well for reading and clearing codes. Not sure which one to grab? Check our Best OBD2 Scanners for DIYers roundup.
That’s it. You don’t need the car running. You don’t need to drain the battery. You can’t fry anything by plugging a scanner in. The OBD2 port is passive — it just listens.
Step 1: Find the OBD2 Port
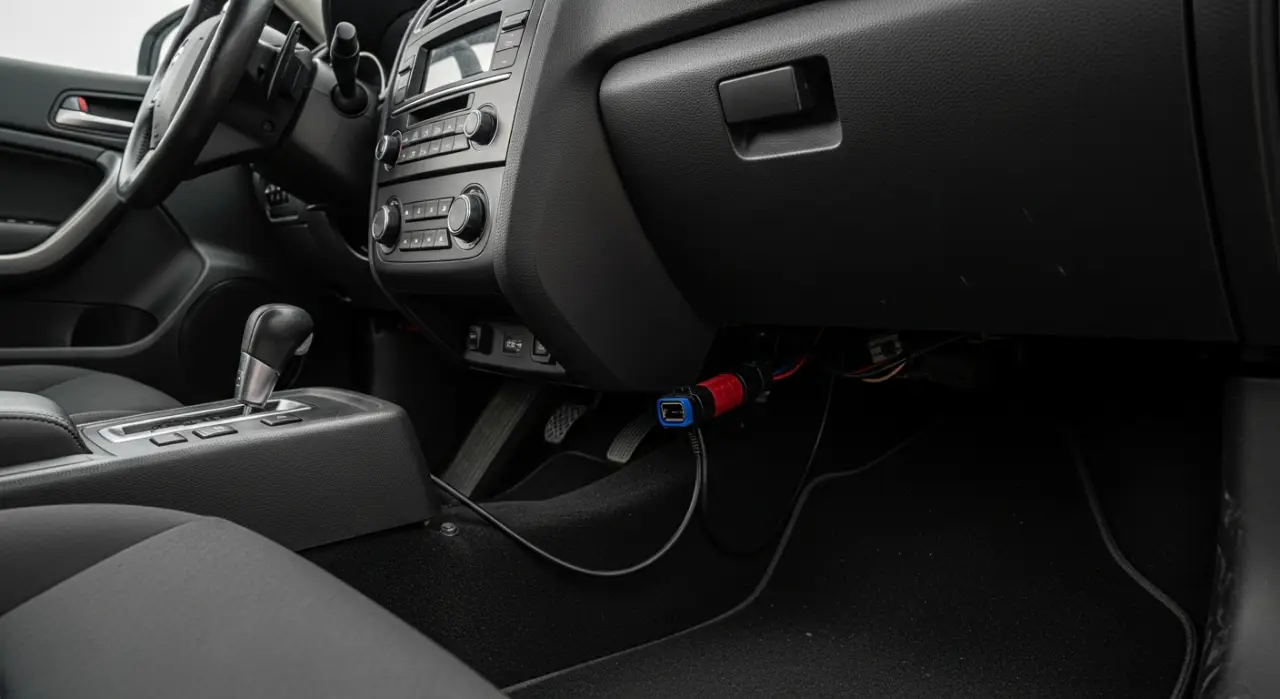
The OBD2 port is a 16-pin trapezoid-shaped socket, almost always located under the dashboard on the driver’s side. On most cars you can reach it without kneeling — it sits somewhere between the steering column and the left door, usually within arm’s reach from the driver’s seat.
Common exact locations:
- Below the steering column, facing down or slightly toward you — the most common spot on Japanese domestics (Toyota, Honda, Nissan, Subaru, Mitsubishi)
- Behind a small plastic panel or flap in the lower dash trim — snap it open with your finger, no tools needed
- Center console side on some European-origin vehicles re-badged for JDM markets
- Inside the glovebox on a handful of early-2000s models — rare, but it happens
JDM import note: If you’re driving a genuine grey-market Japanese domestic market import (a car that was never sold new in your country), the OBD2 port may still be present and fully functional, but some very early JDM vehicles from 1996–1998 used Toyota’s or Nissan’s own pre-OBD2 diagnostic connector instead. If your port doesn’t match the standard 16-pin shape, you’re dealing with an OEM-proprietary system. A standard OBD2 scanner won’t read it — you’ll need a marque-specific tool or a dealer cable.
For the vast majority of readers, the standard port is right where it should be. Slide under the dash with your phone flashlight if you can’t see it immediately.
Step 2: Turn the Ignition to the ON Position (KOEO)
Do not start the engine. Turn the key (or push the start button once without pressing the brake) to bring the dash lights on. This is called Key On, Engine Off — abbreviated KOEO. The instrument cluster illuminates, the fuel pump primes, and the car’s ECU powers up.
Why not just start the car? You can on most scanners, and live data works better with the engine running — but for pulling stored trouble codes, KOEO is cleaner and avoids any idle fluctuations interfering with the connection handshake.
Step 3: Plug the Scanner Into the OBD2 Port
Line up the connector and push it in firmly until it clicks. The fit is snug by design — it needs to seat fully to make contact on all 16 pins. A loose connection is the number-one reason scanners fail to communicate.
If you’re using a Bluetooth or Wi-Fi dongle paired with a phone app (like Torque Pro, OBD Fusion, or Car Scanner ELM), plug the dongle in now and open your app. The dongle will usually flash an LED to confirm it has power from the port.
If you’re using a handheld scanner with a built-in screen, it will boot up automatically once it draws power from the port.
Step 4: Let the Scanner Connect and Navigate to “Read Codes”
Give it five to ten seconds. The scanner handshakes with the ECU, identifies the vehicle protocol (most modern cars use CAN bus), and loads the menu.
From here, the exact wording varies by scanner brand, but you’re looking for one of these options:
- Read Codes
- Diagnostic Trouble Codes
- Fault Codes
- DTC
Select it. The scanner queries the ECU and returns a list of codes within a few seconds.
Step 5: Read and Record Every Code — Stored and Pending
This is the step most beginners rush. Don’t just glance at the code and close the app — write everything down or screenshot it.
What you’re looking at:
- Stored codes (also called confirmed or active codes): These have triggered the check engine light. The ECU has seen the fault condition often enough to confirm it. Example:
P0420— Catalyst System Efficiency Below Threshold. - Pending codes: The ECU detected a possible fault but hasn’t confirmed it yet. The light may not be on. These are worth noting — a pending code that repeats over the next drive cycle becomes a stored code.
- Permanent codes: Some scanners show these separately. They can only be cleared by the ECU itself once the fault is confirmed fixed through a drive cycle — clearing them manually with a scanner has no effect.
For each code, note:
- The code itself (e.g., P0301)
- The short description shown on screen (e.g., “Cylinder 1 Misfire Detected”)
- Whether it’s stored or pending
Want to understand what the letters and numbers in a code actually mean? Understanding OBD2 Code Format breaks it all down.
Step 6: Pull the Freeze Frame Data
This is the most underused feature on basic scanners and the most useful data you can capture. Freeze frame is a snapshot the ECU took of key sensor values at the exact moment the fault was detected — engine RPM, vehicle speed, coolant temperature, fuel trim, load percentage.
Why it matters: if your code is intermittent (comes and goes), the freeze frame tells you the conditions under which it set. Was the engine cold? At highway speed? Under heavy load? That context cuts your diagnostic time in half.
Look for a “Freeze Frame” or “FF Data” option alongside each stored code. Screenshot or photograph it. Even if you don’t know what fuel trim means right now, a mechanic will.
Step 7: Write the Code Down Before You Clear Anything
Clearing codes before you’ve diagnosed the fault is one of the most common DIY mistakes. Once you clear, the freeze frame is gone, the readiness monitors reset to “not ready,” and if the fault doesn’t reappear immediately, you lose your diagnostic trail.
Record everything first. Then decide whether to clear.
There are legitimate reasons to clear codes — after you’ve repaired the fault, or to reset the monitors before a smog test. But that’s a separate decision. See How to Clear an OBD2 Code (and When Not To) for the full breakdown.
What to Do With the Code Next
You have a code. Now what?
- Look it up — Search the exact code plus your car’s year, make, and model. Generic P0xxx codes apply across all OBD2 vehicles, but manufacturer-specific P1xxx codes (and P3xxx on some brands) are narrower. Model-specific forums are often more useful than generic code databases.
- Check the symptoms against the code — A P0171 (System Too Lean, Bank 1) paired with rough idle and a vacuum hose hiss points somewhere specific. A P0171 with no other symptoms means something different.
- Identify whether it’s a soft fault or a hard fault — Soft faults (intermittent, no driveability impact) can often wait for weekend investigation. Hard faults (misfires, temperature warnings, oil pressure) warrant parking the car.
- Cross-reference with the freeze frame — Match the conditions in the freeze frame to what you were doing when the light came on.
- Decide: DIY or shop? — Many codes resolve with straightforward fixes: a loose gas cap for P0442, fresh spark plugs for a P030x misfire, a $12 MAF sensor cleaner for P0101. Others require oscilloscopes and pressure gauges. Know your limit.
Head back to the OBD2 Codes hub for guides on common codes by system — engine, transmission, emissions, and body — organized so you can find your specific fault fast.
Quick Reference: The Full Step Sequence
- Locate the OBD2 port (under dash, driver’s side)
- Turn ignition to ON / KOEO — engine off
- Plug scanner in firmly until it clicks
- Let it connect, navigate to “Read Codes” or “DTC”
- Note every stored code and every pending code
- Open Freeze Frame and record or photograph the data
- Write it all down before touching “Clear”
- Research the code, match to symptoms, act accordingly
That’s the whole process. First time through it takes maybe ten minutes including finding the port. Second time it’s five. You now know more about your car’s fault history than most people who hand their keys to a stranger at a shop.
Recommended Products
Need a scanner to follow these steps? These are the readers worth your money, from phone adapters to standalone handhelds. We rank on aggregated owner reviews rather than our own testing, and prices are indicative — check the live listing.

Best for DIYers who want pro-grade data on their phone
- Reads and clears codes plus freeze frame data
- Repair reports drawn from a huge database
- Covers ABS, airbag and manufacturer-specific codes
Why buy it: the one to get if you want more than a code number — freeze frame and repair context on the app make diagnosis far faster.

Best for enthusiasts who want speed and locked-down security
- Very fast, reliable data connection
- Secured to prevent unwanted access
- Deep vehicle coverage with good apps
Why buy it: the power-user adapter — fast live data and broad protocol support for people who tinker often.

Best for people who want a standalone tool, no phone needed
- Built-in screen with its own battery-free operation
- Reads, clears and shows freeze frame
- Live data and I/M readiness for smog checks
Why buy it: the grab-and-go pick — plug in, read the code, no app or pairing to fuss with.

Best for a do-it-all budget pick with a screen and Bluetooth
- Works as a handheld or a phone adapter
- Reads and clears codes with freeze frame
- Compact enough to leave in the glovebox
Why buy it: the flexible value option — handheld when you want it, phone-connected when you don’t.
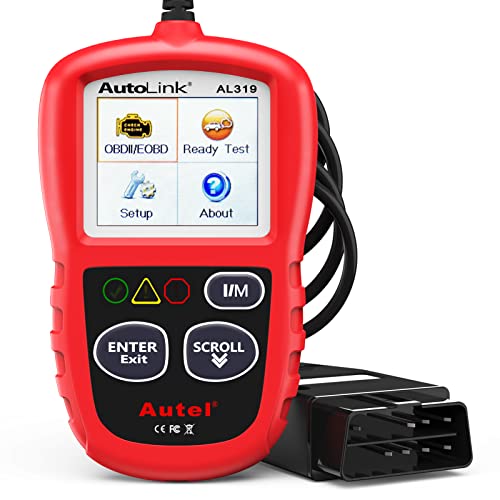
Best for the tightest budget that still reads freeze frame
- Simple one-button code read and clear
- Shows freeze frame data
- Reliable entry-level Autel build
Why buy it: the honest cheap start — everything this step-by-step guide needs, for very little money.
Prices are pulled from Amazon and were accurate as of Aug 22, 2026, 6:54 PM EDT. Product prices and availability are subject to change — the live price is shown on Amazon.