
Affiliate Disclosure
Some links on this page are affiliate links. As an Amazon Associate, we earn from qualifying purchases — at no extra cost to you. We do not buy, test, or physically handle the products we cover; our rankings come from aggregated owner reviews, ratings and expert consensus. Commissions never change our verdicts. How we rank & full disclosure.
Short version: Swirl marks are thousands of tiny scratches in your clear coat, almost always caused by bad washing. You remove them by polishing — physically leveling the clear coat so the scratches are gone for good. Light swirls come out by hand; moderate ones need a dual-action polisher. Start with the gentlest polish that works, keep the machine flat and moving, and avoid edges — that's how you kill swirls without burning through your paint.
What swirl marks actually are
Pull your car into direct sunlight and look at the hood. See those fine, circular, spiderweb scratches radiating out — most visible under bright light and almost invisible in shade? Those are swirl marks. They're not a coating problem or a wax problem; they're thousands of microscopic scratches carved into the top layer of your clear coat. Individually they're tiny, but collectively they scatter light and rob your paint of that deep, glossy reflection, leaving it looking hazy and tired.
The good news: because they live in the clear coat's surface, polishing removes them completely. The better news: once you understand what causes them, you can stop creating new ones.
What causes swirl marks
Nearly every swirl is self-inflicted through washing and drying. The usual culprits:
- Sponges. They trap grit against the paint and grind it in. Never use one — a proper wash mitt is far safer.
- Washing in circles with a dirty mitt, or reusing wash water full of grit.
- Rough or dirty drying towels dragged across the surface.
- Automatic tunnel washes with stiff brushes that have scrubbed a thousand gritty cars before yours.
- Wiping dust off dry paint with your hand or a shop rag — a classic swirl-maker.
Understanding this matters, because there's no point correcting swirls if you're going to put them right back on next weekend. Fixing the technique is half the fix.
Removing light swirls by hand
If your swirling is light, you can genuinely improve it by hand. It's slow and it won't touch heavy defects, but it's nearly impossible to damage your paint this way, so it's a great place to start.
- Wash, dry and clay first. Never polish over grit — see our clay bar guide.
- Use a fine polish on a foam applicator. A few pea-sized dots is plenty.
- Work a small section with firm, overlapping passes — up-and-down, then side-to-side.
- Buff off with a clean microfiber and check under light.
You'll knock back light swirls and boost gloss. For anything moderate or heavy, it's time for a machine.
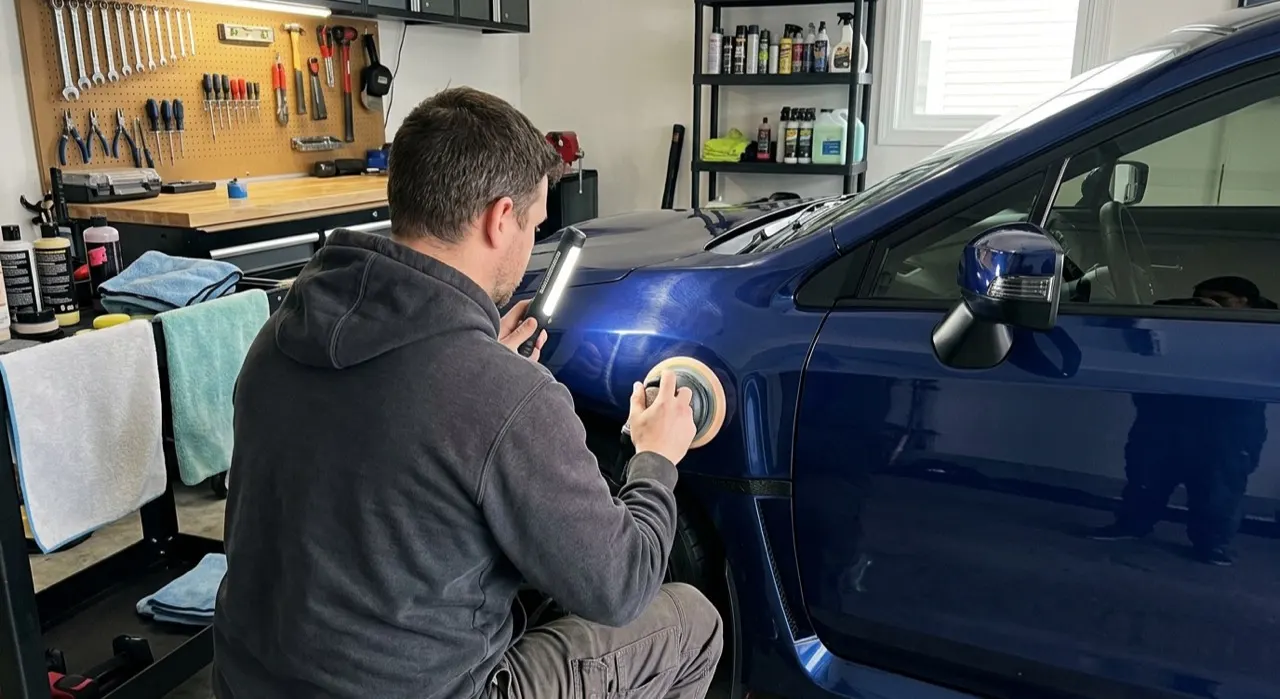
Removing swirls with a dual-action polisher
A dual-action (DA) polisher is the tool for a real swirl-free finish. It cuts consistently and evenly across the whole car, and its oscillating motion spreads heat so it's very forgiving — far safer than a rotary buffer for anyone learning. Here's the safe approach:
- Pair a polishing pad with a fine-to-medium polish for typical swirling. Only step up to a compound and cutting pad if a test spot proves you need it.
- Do a test spot first. Correct one small area, wipe, and inspect under a swirl light. This confirms your combo is strong enough before you commit.
- Keep the pad flat and moving at about one inch per second with 50 percent overlap. Slow movement cuts; lingering builds heat.
- Use light, even pressure — let the machine's weight do the work.
- Two or three passes per section, then wipe and inspect. Swirls gone? Move on.
For the full machine walkthrough, see our how to polish a car guide, and our paint correction guide covers taking it further.
Avoiding clear-coat burn-through
Burn-through — where you polish through the clear coat and expose the color underneath — is the nightmare scenario, and it's almost always avoidable. It happens from heat and over-working thin areas. To stay safe:
- Use a DA, not a rotary, until you've got real experience. Rotaries build heat fast.
- Keep the machine moving — never let it sit in one spot spinning.
- Go easy on edges, body lines and raised contours. Clear coat is thinnest there and burns first. Some detailers tape these off.
- Start gentle. The least aggressive polish that removes the swirl also removes the least clear coat.
- Don't chase deep scratches. A scratch that catches your fingernail may be too deep to remove safely — leave it rather than grinding through your clear.
Respect those rules and you'd have to try hard to hurt your paint with a DA.
Keeping swirls gone
Here's the part people forget: correction is pointless if your wash habits keep re-swirling the paint. Once you've done the work, protect it — switch to a proper two-bucket wash with a plush mitt, ditch the sponge forever, use a clean drying towel or a blower, and never wipe dry paint. Lay down a wax, sealant or ceramic afterward for slickness and protection so grit slides off instead of digging in. Fix the technique and the swirls stay gone. Keep the bad habits and you'll be back here in three months.
The honest verdict
Swirl marks look devastating but they're one of the most satisfying defects to fix, because the transformation is dramatic and the swirls genuinely disappear. Start by hand if they're light, move to a dual-action polisher for real correction, always begin with the gentlest polish that works, and keep clear of edges to avoid burn-through. Then — and this is the bit that actually matters long-term — fix the washing habits that caused them. Do all that and your paint stays swirl-free and glossy for the long haul. If you want vetted products, our top car polish picks are a good starting point.
Recommended Products

Best for gloss and light-swirl removal
- Glaze-rich finishing polish
- Removes light swirls
- Deep, wet-look gloss
- Works by hand or machine
Why buy it: stunning gloss and light-swirl removal by hand or DA for about $13.

Best for heavier swirls and scratches
- Strong cut
- Still finishes well
- Cheap
Why buy it: the cutting partner for the heavier swirls and scratches a finishing polish leaves behind.

Best for removing swirls fast on a DA machine
- Long 15mm throw corrects fast
- Smooth, low-vibration
- Beginner-safe dual-action
- Strong warranty
Why buy it: long-throw correction that is beginner-safe and you will not outgrow — the machine that takes swirls out far faster than by hand.
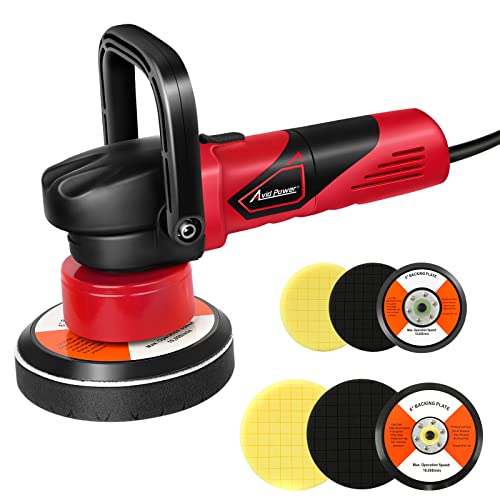
Best for beginners on a budget
- Cheap and capable
- Beginner-safe DA
- Great value
Why buy it: the smart first machine for most people who want to correct swirls without spending big.
Prices are pulled from Amazon and were accurate as of Aug 22, 2026, 6:54 PM EDT. Product prices and availability are subject to change — the live price is shown on Amazon.