
Affiliate Disclosure
Some links on this page are affiliate links. As an Amazon Associate, we earn from qualifying purchases — at no extra cost to you. We do not buy, test, or physically handle the products we cover; our rankings come from aggregated owner reviews, ratings and expert consensus. Commissions never change our verdicts. How we rank & full disclosure.
Short version: Paint correction is permanently removing defects from your clear coat with machine polishing — not hiding them. A one-step correction with a dual-action polisher gets a daily driver 60-80 percent of the way to flawless with low risk, and it's very achievable at home. Multi-step correction chases perfection but removes more clear coat and needs more skill. Start with a one-step, use the least aggressive process that works, and know when to stop.
What paint correction really means
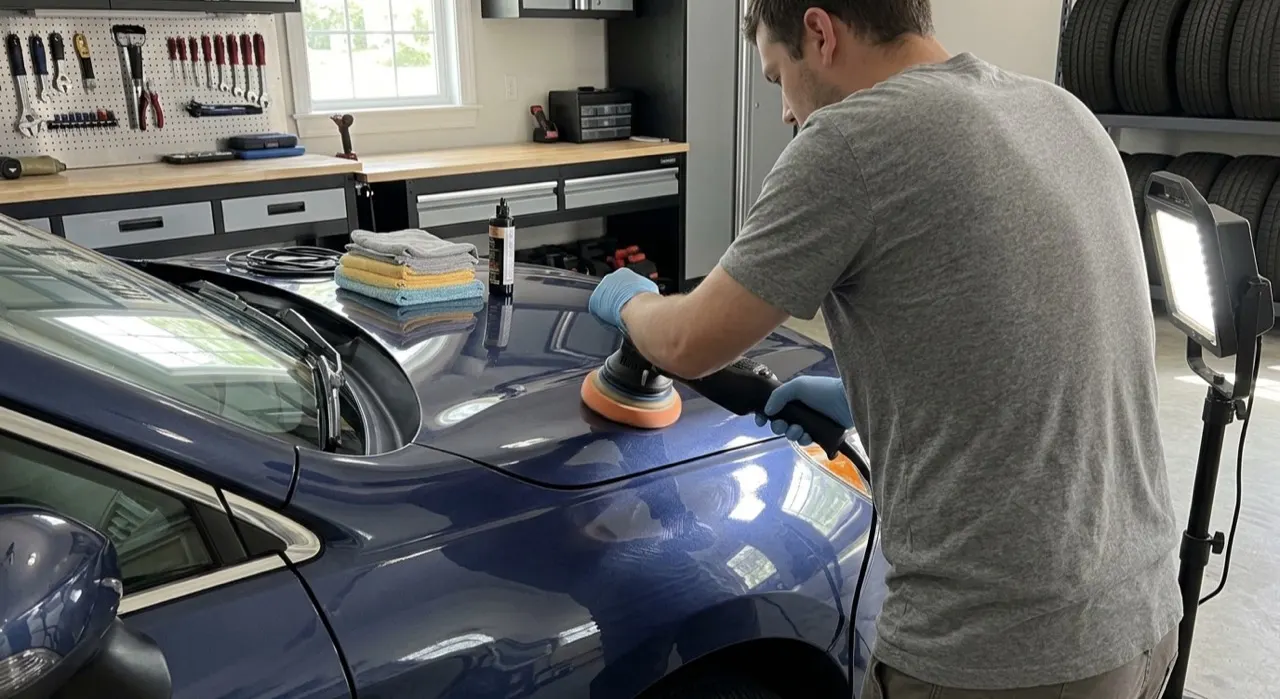
Paint correction is the difference between hiding a problem and actually fixing it. A glaze fills swirls with oils that wash away in a few weeks. Correction physically levels the clear coat down just enough to erase the defect for good. When people post those jaw-dropping before-and-afters — a dull, swirled black car turned into a liquid mirror — that's correction, and it's permanent because the damage is genuinely removed, not masked.
It sits at the top of the detailing skill ladder because you're removing clear coat, which is finite and unforgiving if you overdo it. But the payoff is huge, and a sensible one-step is well within reach for a patient beginner. If you've never machine-polished before, read our how to polish a car guide first — correction is polishing with intent.
The levels of correction
Correction isn't one thing — it's a spectrum, and choosing the right level is the whole game.
- One-step (AIO): a single all-in-one product and pad removes light-to-moderate swirls and haze in one pass. Gets you 60-80 percent perfect, fast, with minimal clear coat removed. This is where most people should live.
- Two-step: a compound to cut deeper defects, followed by a polish to refine the finish and remove the compound's haze. Removes far more, gets you 85-95 percent perfect.
- Multi-step (three-plus): heavy cutting, then progressively finer polishing stages, chasing near-100 percent. Show-car territory. Removes the most clear coat and takes the most time and skill.
The golden rule: always start with the least aggressive step that gets the result you want. You can escalate; you can't put clear coat back. Our compound vs polish vs glaze guide explains exactly what each product cuts.
How far to take it at home
Here's my honest advice after years of doing this: for the vast majority of daily drivers, a one-step correction is the sweet spot. It removes the swirls that bother you most, brings back a deep gloss, takes an afternoon, and carries almost no risk of ruining your paint. That last 20 percent of perfection — chasing every micro-marring under a swirl light — takes exponentially more time, more clear coat, and more skill, and honestly nobody notices it in a parking lot.
Where I tell people to stop: heavy multi-step correction on your only car, and rotary polishers, unless you've genuinely put in the practice. Rotaries generate real heat and can burn through an edge or a raised body line in seconds. A dual-action polisher is far more forgiving and is what you should own for home work — our best DA polisher guide covers the machines worth buying.
Gear you actually need
- A dual-action polisher. The safe, forgiving powered tool for home correction.
- Pads: a cutting pad for compounding, a polishing pad for refining, a finishing pad for the final gloss. Match pad to product — our polishing pads guide makes this simple.
- Compound and polish. Or a good all-in-one if you're doing a one-step.
- A swirl/inspection light. This is the tool that separates real correction from guessing. You cannot judge your progress under normal light — a focused LED reveals the defects and confirms when they're gone.
- Panel prep / IPA wipe to remove polishing oils and see the true corrected finish.
- Lots of clean microfiber towels.
The correction process
- 1. Wash, decontaminate and clay. Never correct dirty or contaminated paint — you'll grind grit into it. See our clay bar guide.
- 2. Do a test spot. Pick one small area, run your chosen pad-and-product combo, wipe, and inspect under your swirl light. This tells you if your combo is aggressive enough — before you commit to the whole car.
- 3. Correct panel by panel. Work small sections with slow, overlapping passes. Let the machine and product do the cutting.
- 4. Refine if two-step. Follow your compound with a polish to remove any haze the compound left.
- 5. Wipe down and inspect. Panel prep to strip oils, then check under light. Bare, corrected clear coat is now exposed.
- 6. Protect immediately. Wax, sealant or ceramic — correction strips all old protection, so the fresh paint needs sealing.
The test spot is the step beginners skip and pros never do. It saves you from realizing halfway across the car that your combo was too weak — or too strong.
Knowing when to stop
The hardest discipline in correction is walking away. Some defects — deep scratches that catch your fingernail, RIDS (random isolated deep scratches) — sit below the safe correcting depth of your clear coat. Chasing them means removing dangerous amounts of clear, risking a burn-through or thinning the coat so it fails prematurely. If a defect won't come out after a sensible amount of work, it stays. A 95 percent car with healthy clear coat beats a 99 percent car with clear coat you've compromised. If you're worried about defects you can't safely remove, our swirl removal guide covers what's realistic to fix.
The honest verdict
Paint correction is one of the most rewarding things you can do to a car, and a home one-step delivers a genuinely stunning result with very manageable risk. Buy a dual-action polisher and an inspection light, always start with the gentlest combo that works, do a test spot, and know when a defect is beyond safe reach. Correct with purpose, protect immediately, and resist the urge to chase perfection into your clear coat. Get that balance right and your paint will look better than the day it left the showroom — and it'll be genuinely fixed, not faked.
Recommended Products

Best for the safe, forgiving machine to correct on at home
- Long 15mm throw corrects fast
- Smooth, low-vibration
- Beginner-safe dual-action
- Strong warranty
Why buy it: long-throw correction that is beginner-safe and you will not outgrow — the DA to build a correction kit around.

Best for removing heavier swirls and scratches
- Strong cut
- Still finishes well
- Cheap
Why buy it: the cutting stage for a multi-step correction — clears the deeper defects before you refine.

Best for gloss and light-swirl removal
- Glaze-rich finishing polish
- Removes light swirls
- Deep, wet-look gloss
- Works by hand or machine
Why buy it: the refining step that pulls a deep, wet-look gloss after compounding — or a light one-step on its own.

Best for a one-and-done correction pass
- Adjustable compound-to-polish
- Strong cut and good finish
- Low dust
Why buy it: a versatile all-in-one that cuts and finishes in a single step — ideal for the one-step correction most daily drivers need.
Prices are pulled from Amazon and were accurate as of Aug 22, 2026, 6:54 PM EDT. Product prices and availability are subject to change — the live price is shown on Amazon.