
Affiliate Disclosure
Some links on this page are affiliate links. As an Amazon Associate, we earn from qualifying purchases — at no extra cost to you. We do not buy, test, or physically handle the products we cover; our rankings come from aggregated owner reviews, ratings and expert consensus. Commissions never change our verdicts. How we rank & full disclosure.
Short version: Polishing is the step that actually removes defects and restores gloss — it's not the same as waxing. Wash and clay first, pick a polish that matches how bad the paint is, work small sections with light overlapping passes, and let the product do the cutting. Do it by hand for light work, or grab a dual-action polisher when you want faster, more even correction. Rev it up slow, keep it controlled, and don't chase perfection on your first run.
What polishing actually does
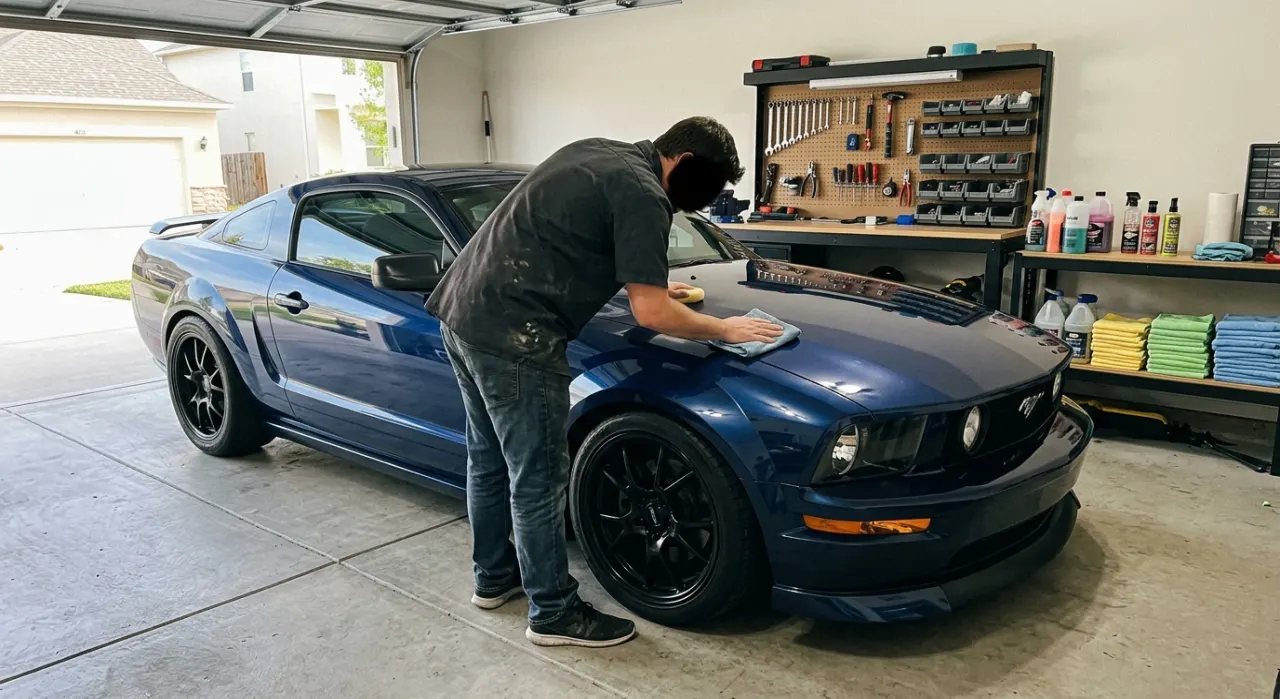
Here's the thing most people get wrong before they even start: polish and wax do completely different jobs. Wax sits on top of your paint and adds protection and shine. Polish contains tiny abrasives that physically remove a microscopic layer of your clear coat — and with it, the swirls, oxidation and light scratches living in that layer. If your paint looks hazy, has spiderweb swirls under the sun, or has gone dull and flat, wax won't fix it. Polishing will. If you're still unsure which you need, read our breakdown of polish vs wax before you buy anything.
Because you're removing clear coat, polishing is the one detailing step where you can genuinely damage your paint if you get careless. The good news: done sensibly, it's one of the most satisfying things you can do to a car. That dead, flat panel comes back to a deep wet gloss, and it's all you.
Prep: the boring part that decides everything
You cannot polish dirty paint. Any grit still on the surface becomes an abrasive under your pad and adds fresh scratches — the exact opposite of what you want. So the order is non-negotiable:
- Wash and dry thoroughly. Get the loose dirt off with a proper two-bucket wash and dry with a clean microfiber.
- Clay bar the paint. Even a clean-looking car has bonded contamination you can feel as a rough, gritty texture. Clay pulls it out so the surface is dead smooth. Our full clay bar decontamination guide walks through the feel-the-grit test.
- Work in the shade, on cool paint. Hot panels and direct sun make polish flash off too fast and can cause hazing. A cool garage or shaded driveway is ideal.
- Tape off trim. Rubber and plastic trim stains white if you get polish on it and it's a pain to remove. A roll of painter's tape saves a lot of grief.
Do this properly once and the actual polishing goes twice as smoothly. Rush it and you'll be adding swirls while trying to remove them.
Choosing the right polish for the damage
Not all polishes cut the same. Reaching for the most aggressive product "just in case" is how beginners burn through clear coat. Match the product to the paint:
- Light swirls, dullness, oxidation: a finishing polish or all-in-one. Gentle cut, great gloss.
- Moderate swirls and light scratches: a medium polish, or a one-step product on a machine.
- Heavier scratches and deep swirls: a compound to cut, followed by a polish to refine the finish.
Always start with the least aggressive combination that gets the job done — you can always step up. Our guide to compound vs polish vs glaze explains exactly which product cuts what, and if you want vetted products, see our top picks on the best car polish roundup.
How to polish by hand
Hand polishing is where I tell every nervous first-timer to start. It's slower and it won't touch deep defects, but it's almost impossible to hurt your paint, and it teaches you what polish is supposed to feel and look like.
- Use a foam applicator pad. A microfiber applicator works too, but foam gives you more control.
- Apply four or five pea-sized dots of polish to the pad — you need less than you think.
- Work a small section, roughly two feet by two feet. Never try to do a whole door at once.
- Use firm, overlapping passes — go up and down, then left and right, keeping consistent pressure. This crosshatch pattern makes sure you cover every inch evenly.
- Buff off with a clean microfiber once the residue goes light and hazy. Flip to a dry side of the towel for the final wipe.
Step back and check your work under good light before moving on. Hand polishing rewards patience — the deeper the gloss you want, the more sections you slowly work through.
How to polish with a dual-action machine
When you want real correction — even results across the whole car, deeper swirls gone — a dual-action (DA) polisher is the tool. The "dual action" bit matters: the pad spins and oscillates at the same time, which spreads heat and makes it very hard to burn through paint the way an old rotary buffer can. It's the safest powered entry point, which is why it's what most enthusiasts run. If you're shopping, our best DA polisher guide covers the machines worth owning.
- Prime the pad with a few dots of polish spread around, plus a small amount worked into the face so it isn't bone dry on the first pass.
- Spread on speed 1-2 with the machine off the paint, then dab the polish across the section before you start.
- Polish on speed 4-5 with light, even pressure — let the weight of the machine do the work, don't lean on it.
- Move slowly: about one inch per second, with 50 percent overlap on each pass. Slow and steady is what cuts; fast and frantic just smears product around.
- Keep the pad flat to the panel so pressure is even, and do two or three slow passes per section.
- Wipe and inspect. Buff the residue and check under light. If the defect's gone, move on. If not, do one more set of passes or step up your product.
Match your pad to your product — a cutting pad with a polish, a polishing or finishing pad for refining. Getting this pairing right is half the battle, and our polishing pads guide makes it simple.
Finishing and protecting
Once you've corrected the paint, you've removed the old wax or sealant along with the defects — so the fresh, bare clear coat needs protection. This is exactly when you lay down a wax, sealant or ceramic. Polishing then protecting is the correct order, and it's why the finish looks so deep afterwards. Do a final wipe-down with a panel prep or diluted IPA to remove any polishing oils, then apply your protection of choice.
The mistakes that undo all your work
The two big ones: using too much product (which just clogs the pad and makes buffing miserable) and moving the machine too fast (which means you're not actually cutting anything). Keep your product light and your movement slow. Also resist the urge to keep hammering a stubborn deep scratch — some are below the clear coat and no amount of polishing will remove them safely. We've catalogued the rest in our polishing mistakes guide, and if swirls are your main enemy, our dedicated guide to removing swirl marks goes deeper.
The honest verdict
Polishing a car is completely doable at home, and the results genuinely rival a paid detail if you take your time. Start by hand to build confidence, step up to a dual-action when you're ready for real correction, and always begin with the gentlest product that works. Prep properly, work small sections, go slow, and protect the paint when you're done. Get those fundamentals right and you'll have that deep, wet, "did you just get this repainted?" gloss — earned in your own driveway.
Recommended Products

Best for gloss and light-swirl removal
- Glaze-rich finishing polish
- Removes light swirls
- Deep, wet-look gloss
- Works by hand or machine
Why buy it: the gentle finishing polish to start with — stunning gloss and light-swirl removal by hand or DA for about $13.

Best for heavier swirls and scratches
- Strong cut
- Still finishes well
- Cheap
- Cut first, then refine with a polish
Why buy it: the cutting partner for the deeper swirls and scratches a finishing polish cannot reach.

Best for the best all-round dual-action polisher
- Long 15mm throw corrects fast
- Smooth, low-vibration
- Beginner-safe dual-action
- Strong warranty
Why buy it: long-throw, beginner-safe correction — the machine to step up to when hand polishing stops being enough, and one you will not outgrow.
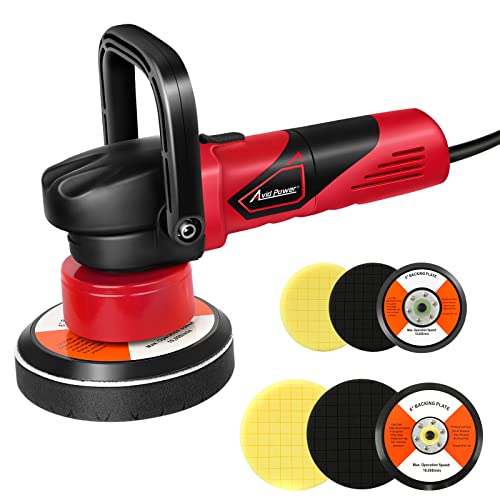
Best for beginners on a budget
- Cheap and capable
- Beginner-safe DA
- Great value
- Spreads heat, hard to burn paint
Why buy it: the smart first machine for most people — a low-risk way to try powered correction before spending on a premium DA.
Prices are pulled from Amazon and were accurate as of Aug 22, 2026, 6:54 PM EDT. Product prices and availability are subject to change — the live price is shown on Amazon.