
Affiliate Disclosure
Some links on this page are affiliate links. As an Amazon Associate, we earn from qualifying purchases — at no extra cost to you. We do not buy, test, or physically handle the products we cover; our rankings come from aggregated owner reviews, ratings and expert consensus. Commissions never change our verdicts. How we rank & full disclosure.
Short version: Swirl marks are trapped grit being dragged across your clear coat during washing and drying. Prevent them by removing loose dirt before you touch the paint, using two buckets so your mitt stays clean, washing in straight lines with a plush mitt, drying with a proper towel, and never touching an automatic car wash. Swirls are self-inflicted, which means they are preventable.
Here is the truth nobody selling car products wants to lead with: the biggest source of swirl marks on most cars is the owner washing the car. Not birds, not the sun, not cheap paint. The act of washing, done carelessly, is what carves those spider-web scratches into the clear coat. The good news is that this puts prevention entirely in your hands. Treat every wash like a clean run — one careless swipe is all it takes to put a mark in.
What a swirl mark actually is
Zoom in on a swirl and it is just a scratch — a tiny groove in the clear coat, the transparent layer over your paint. A swirled panel has thousands of them, running in every direction. Individually they are microscopic. Collectively they form that hazy, spider-web pattern you only notice when direct light hits the panel.
That is why swirls seem to appear and disappear. Under a cloudy sky the light is diffuse and the scratches are invisible. Roll the car under a streetlight or into direct sun and every one of those grooves scatters that point of light, and suddenly the whole hood looks like a cobweb. The paint has not changed — the lighting has.
How grit gets dragged across your paint
Every swirl needs two ingredients: an abrasive particle and something pressing it across the paint. In washing, the abrasive is road grit, sand and dust; the thing pressing it is your mitt, sponge or towel. Understanding this makes prevention obvious — you either keep grit off the paint, or you keep it from being dragged.
The classic failure points are the single-bucket wash (your mitt reloads with the same grit every dip), the dropped mitt or towel (now coated in driveway grit), the stiff sponge (which holds grit against the paint instead of pulling it away from it), and the automatic wash (spinning brushes full of everyone else's dirt).
Prevention step 1: get the loose dirt off first
The dirt you rinse away before touching the car is dirt that can never scratch it. A thorough pre-rinse — and ideally a foam soak on top — knocks off and softens the loose grit so there is far less abrasive left when your mitt makes contact. This one habit removes a huge share of your swirl risk before the wash even starts.
If you have a foam cannon, this is where it earns its keep. The clinging foam gives dirt time to release its grip on the paint. If you do not, a careful rinse from top to bottom does most of the same job.
Prevention step 2: two buckets, every time
This is the big one. With two buckets, you dip your mitt in soapy water, wash a section, then rinse the mitt in a separate rinse bucket before reloading. That rinse strips the grit out of the mitt so you are not smearing it back across the paint on the next pass. One bucket means every dip re-coats your mitt with the dirt you just removed — you are effectively sanding the car.
Grit guards in the bottom of each bucket trap sunken dirt so it stays down there. The full technique — bucket setup, mitt rotation, why it works — is worth reading in detail in our two-bucket method guide. If you change one thing about how you wash, make it this.
Prevention step 3: the right tool on the paint
What touches your paint matters enormously. A plush microfiber or lambswool mitt has deep fibers that pull grit up and away from the surface, holding it in the nap until you rinse it out. A flat sponge does the opposite — it traps grit between itself and the clear coat and grinds it in with every stroke.
This is not a small difference. It is the whole reason we tell people to bin the sponge. The comparison is stark enough that we wrote it up on its own in wash mitt vs sponge, and the top mitt picks live on our best wash mitt roundup. Spend your money here if you spend it anywhere.
Prevention step 4: straight lines, light pressure
Wipe in straight lines, front to back, not in circles. If a stray particle does get dragged, a straight scratch is far less visible than a circular one and much easier to polish out later — and circular motions are literally what create the classic "swirl" shape. Use light pressure and let the soap and mitt do the work. If something will not come off, stop and treat it with a dedicated remover rather than scrubbing.
Work top-to-bottom so you are always moving from cleaner panels to dirtier ones, never dragging lower-body grime up onto the roof.
Prevention step 5: drying is a wash step too
People obsess over the wash and then swirl the paint drying it. A rough towel, a dropped towel, or aggressive wiping puts scratches in just as surely as a bad mitt. Use a large, plush drying towel, blot or glide rather than scrub, and add a drying aid for lubrication. The full approach is in how to dry a car — treat it with the same care as the wash itself.
The one rule that matters most
If you take nothing else from this: stay out of automatic tunnel washes with brushes. Those brushes drag every previous customer's grit across your paint at speed. A single trip can undo months of careful hand-washing. Touchless washes are safer but clean poorly. The only wash that reliably prevents swirls is a careful hand wash — yours.
Do all of this and your clear coat stays glossy for years instead of hazing over. And if your paint already has swirls, prevention still matters going forward — but know that the fix is polishing, which removes clear coat you cannot replace. Far better to never put them there. Once you have prevention dialed, the rest of the wash routine in how to wash a car ties it all together.
Recommended Products

Best for trapping grit so it never touches paint
- Deep grit-trapping chenille noodles
- Huge suds capacity
- Genuinely scratch-free
- Machine washable
Why buy it: scratch-free with a massive suds capacity for under $10 — the single biggest defence against swirl marks.
Best for high lubricity so grit slides instead of grinding
- pH-balanced — cleans without stripping wax or ceramic
- Super-concentrated: about 1 oz per 5-gallon bucket
- Slick enough that grit slides instead of grinding
- Foams well in a cannon or a bucket
Why buy it: a slick, pH-balanced concentrate — the lubricity that lets dirt release rather than drag across your clearcoat.
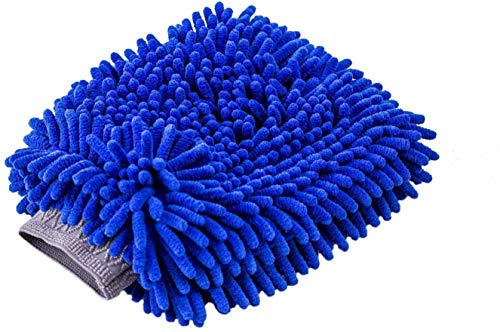
Best for a sturdier cuff and dense weave
- Dense chenille weave
- Reinforced cuff
- Good hand size
Why buy it: nearly as good as our pick, with a sturdier cuff that holds up wash after wash.
Best for a forgiving, foamy shampoo that is hard to get wrong
- Rich foam and high lubricity for a safe wash
- Added conditioners help paint sheet water
- Widely stocked — easy to find anywhere
- 64 oz bottle dilutes heavily for strong value
Why buy it: the beginner-proof pick — thick, slick and forgiving, so a new washer is far less likely to instil swirls.
Prices are pulled from Amazon and were accurate as of Aug 22, 2026, 6:54 PM EDT. Product prices and availability are subject to change — the live price is shown on Amazon.