
Affiliate Disclosure
Some links on this page are affiliate links. As an Amazon Associate, we earn from qualifying purchases — at no extra cost to you. We do not buy, test, or physically handle the products we cover; our rankings come from aggregated owner reviews, ratings and expert consensus. Commissions never change our verdicts. How we rank & full disclosure.
You've just finished a brake pad replacement and you're ready to drive. Before you pull out of the driveway and test those stoppers on the first corner, there's one more step that most DIYers skip — and skipping it will cost you braking performance, rotor life, and potentially your safety.
Bedding in your new brake pads takes about fifteen minutes on a quiet road. Do it right and your brakes will feel sharp, consistent, and fade-resistant from day one. Do it wrong — or ignore it entirely — and you risk glazed pads, vibration, and a brake system that never performs as intended.
This guide covers exactly what to do, why it works, and the mistakes that will set you back.
What Bedding-In Actually Is (And Why It Matters)
Brake pads work by pressing against a rotor and creating friction. But friction alone isn't the whole story. Effective braking depends on a thin, even layer of pad material being deposited onto the rotor surface — this is called the transfer layer.
When you apply the brakes, heat causes the pad compound to soften slightly at the surface. Microscopic particles of friction material transfer from the pad face onto the rotor. Over time and with a proper bedding procedure, this builds into a uniform molecular layer across the entire swept area of the rotor. That layer is what gives you the consistent, predictable bite that new brakes are supposed to deliver.
Without bedding-in, the transfer layer forms randomly and unevenly — or not at all. You end up with inconsistent bite, longer stopping distances, and a higher chance of brake pad glazing: a hard, smooth, heat-crystallised surface on the pad face that dramatically reduces friction. Glazed pads feel wooden, fade quickly, and often cause squealing or vibration.
The bedding procedure is essentially a controlled thermal conditioning process. You're cycling the pads and rotors through increasing heat loads, then letting them cool fully, so the transfer layer builds correctly and the resin binders in the pad compound cure evenly.
Before You Start: Safety and Location
This procedure requires progressive hard braking on a public or private road. Choose your location carefully.
- Find an empty road or car park — an industrial estate on a weekend, an empty section of road with good sight lines, or a quiet stretch you know well.
- Check that it is legal — you are performing traffic manoeuvres, not street racing. Stay within posted speed limits. Do not do this on a highway with other traffic around you.
- Check your surroundings every single run — before each stop, verify there is nothing behind you and no cross traffic.
- Make sure your parking brake is in good condition and your tires are in a safe, drivable state. A bedding run is not the moment to discover your rear tires are on the wear indicators.
- If you recently replaced your own pads, double-check your wheel torque before starting. See our step-by-step brake pad replacement guide for torque specs.
The Brake Pad Bedding Procedure: Step by Step
This is a general-purpose procedure suitable for most organic, semi-metallic, and ceramic street pads. Performance and track-compound pads may require a modified approach — more on that below.
Phase 1 — Moderate Stops (Warm-Up)
- Accelerate to approximately 35 mph.
- Apply firm, moderate brake pressure — enough to feel definite deceleration but not emergency-stop force — and scrub speed down to around 5 mph.
- Do not come to a complete stop. Roll forward slowly and accelerate again immediately.
- Repeat this cycle six to eight times, allowing around 30 seconds of gentle driving between each stop to let surface heat dissipate slightly.
You may notice a slight burning smell toward the end of Phase 1. This is normal — it is the resin binders in the pad compound gassing off during initial heat cure. As long as there is no smoke and the pedal feel remains firm, continue.
Phase 2 — Harder Stops (Transfer Layer Build)
- Accelerate to approximately 50 mph.
- Apply progressively harder brake pressure — not a full ABS-triggering panic stop, but confident, purposeful braking — and decelerate to around 5 mph.
- Again, do not come to a complete stop. Keep rolling forward immediately.
- Repeat this cycle four to six times.
By the end of Phase 2 you should notice the brakes beginning to feel sharper and more linear. The pedal may feel slightly firmer than when you started.
Cool-Down: The Step Nobody Skips Twice
After Phase 2, your rotors will be genuinely hot. The single most important rule of bedding-in is this:
Do not stop the car and sit on hot brakes.
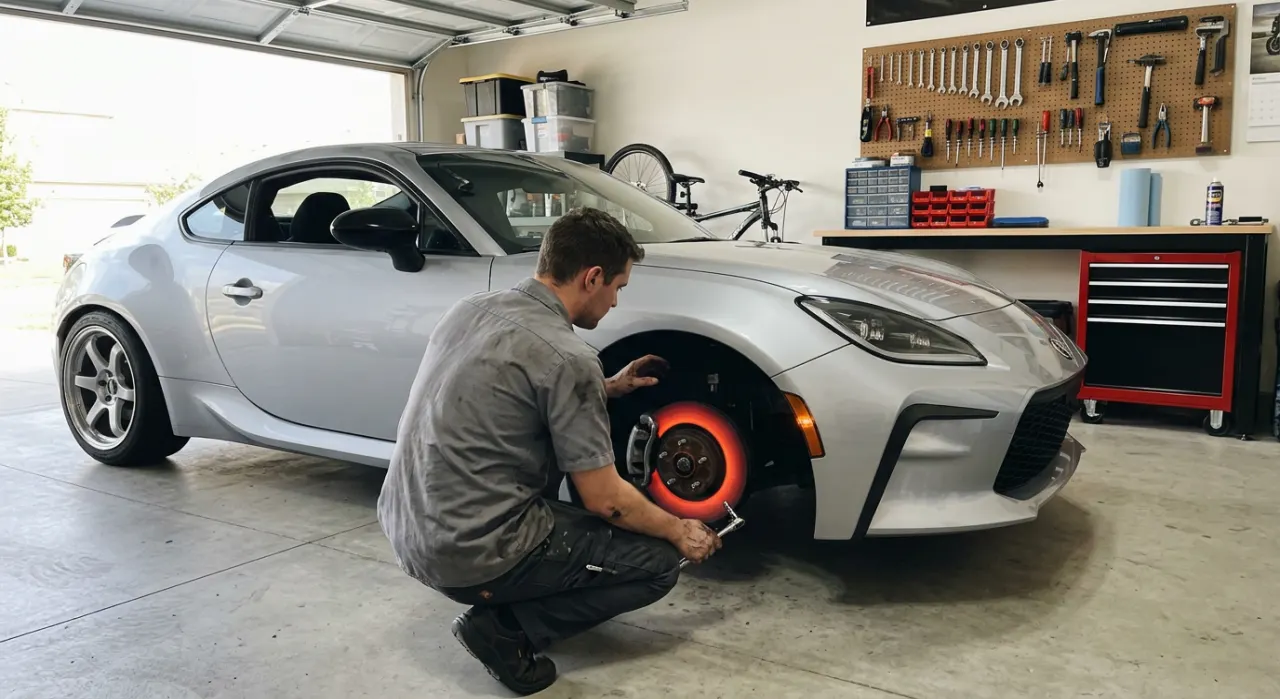
If you park and apply the parking brake — or hold the brake pedal while stationary — with rotors at bedding temperature, the pad face is pressed against one spot on the rotor while it is at peak heat. The pad material transfers unevenly and cures hard in that exact contact patch. The result is a raised deposit on the rotor surface that causes vibration, pulsing through the pedal, and steering-wheel shudder under braking. This is often called brake judder or disc imprinting, and it can ruin a new rotor.
After Phase 2:
- Drive at a gentle, constant speed — no braking — for at least five to ten minutes.
- Allow airflow to carry heat away from the rotors naturally.
- Find a spot where you can park without applying the brakes to hold the car on a slope. Use a wheel chock, leave the car in gear, or choose flat ground.
- Let the car sit and cool for a minimum of 30 minutes before your next drive.
Does Bedding-In Differ by Pad Material?
Yes — and the difference matters if you have chosen a specialist compound.
Organic (NAO) pads are the most forgiving. The procedure above works well, and they typically require fewer cycles to form a complete transfer layer.
Ceramic pads run cooler and take slightly longer to bed in. If your pedal feel still seems inconsistent after the standard procedure, add two or three additional Phase 2 cycles before the cool-down.
Semi-metallic pads generate more heat and need the full procedure without shortcuts. Do not skip Phase 1 — jumping straight to hard stops without warming the compound first can lead to uneven curing.
High-performance and track compounds (including many motorsport-spec sintered pads) often require dedicated multi-heat-cycle bedding over several road sessions, or a specific track-day sighting-lap procedure. Always check the manufacturer's datasheet for these pads. For a detailed comparison of compound types and what they mean for bedding and daily use, see our brake pad material guide in the hub.
Do New Rotors Change the Procedure?
Not dramatically, but there are a few additional considerations.
New rotors have a machined surface finish and may have a light anti-rust coating applied at the factory. The first few stops will clear this coating — you may see light smoke or smell something briefly. This is normal and settles within the first Phase 1 cycle.
What does change with new rotors is the importance of the cool-down rule. A fresh rotor is more susceptible to thermal stress and surface distortion than a seasoned one. Take the cool-down phase seriously. If you are unsure whether your rotors need replacing at all before fitting new pads, our guide on whether you need new rotors covers the key measurements and wear indicators.
Signs of a Correct Bed-In
After cool-down, take the car for a normal drive. A successfully bedded set of pads will feel:
- Firm and progressive — the pedal builds resistance evenly as you press
- Consistent — repeated stops feel the same, no fading on the second or third application
- Quiet — no pronounced squealing, grinding, or vibration under normal braking
- Linear — the car slows proportionally to how hard you press
If you look at the rotor face after bedding, you should see a uniform gray haze across the swept area. That haze is your transfer layer.
Signs of Glazing
If the bedding procedure went wrong — particularly if you came to full stops on hot pads, or skipped the procedure entirely — you may notice:
- A glassy, shiny appearance on the pad face (hard, smooth, visibly different from a fresh pad)
- Reduced bite — the car feels slower to respond when you press the pedal
- Fade under repeated moderate braking — stopping distance increases with each application
- Persistent high-pitched squealing that does not settle after the first few stops
Mild glazing can sometimes be reversed by performing the full bedding procedure again, taking care not to repeat the mistakes. Severe glazing means the pads need replacement. If you are experiencing noise that started after fitting new pads, our guide on brake pad squeal and noise causes walks through the most common culprits and fixes.
Your First Normal Drive: Keep It Cautious
Even after a successful bedding procedure, your brakes will not be at full performance until the transfer layer has been reinforced through normal driving over the next few hundred miles. Expect your stopping distance to be slightly longer than normal for the first few days. Build in more following distance than usual, brake a little earlier for traffic lights, and avoid situations that demand emergency stops if you can help it.
This is not dangerous — it is simply the reality of new components still settling in. By the end of the first week of regular driving, your brakes will feel fully sorted.
Quick Reference: Bedding-In Procedure
- Find a safe, legal, empty stretch of road
- Phase 1: 6–8 stops from 35 mph to 5 mph, moderate pressure, do not stop fully
- Phase 2: 4–6 stops from 50 mph to 5 mph, firmer pressure, do not stop fully
- Cool-down: drive gently for 5–10 minutes, park without holding brakes, leave 30 minutes
- Check for uniform gray haze on rotor face
- Allow shorter stopping distance allowance for first few hundred miles
Recommended Products

Best for quiet, clean, low-dust daily driving
- Very low dust
- Near-silent braking
- Long pad life
- OE-quality feel
Why buy it: the quietest, cleanest daily-driver pad — a genuine upgrade, and it beds in predictably.

Best for stronger bite for spirited driving
- Carbon-fiber ceramic
- Strong cold bite
- Low dust for the grip
Why buy it: more stopping power without the noise or dust of race pads.

Best for OE-quality on a budget
- Quiet ceramic/semi-met
- Includes hardware & shims
- Great price
Why buy it: OE-grade quiet braking with the hardware included.

Best for reliable everyday value
- One-piece design
- Quiet operation
- Widely available
Why buy it: a dependable, quiet everyday pad at a low price.

Best for performance cars driven hard
- High-performance street compound
- Strong, consistent bite
- Track-day capable
Why buy it: a track-capable street pad for enthusiasts who push it — read the datasheet for its bedding schedule.
Prices are pulled from Amazon and were accurate as of Aug 22, 2026, 6:54 PM EDT. Product prices and availability are subject to change — the live price is shown on Amazon.