

Affiliate Disclosure
Some links on this page are affiliate links. As an Amazon Associate, we earn from qualifying purchases — at no extra cost to you. We do not buy, test, or physically handle the products we cover; our rankings come from aggregated owner reviews, ratings and expert consensus. Commissions never change our verdicts. How we rank & full disclosure.
Short version: Cleaning an engine bay safely comes down to a fixed order of operations. Let the engine go stone cold, cover the sensitive electronics, spray degreaser, agitate with brushes, rinse with low pressure held far back, dry it out, then dress the plastics. Do those steps in that order and the job is genuinely low-risk on a modern car. Rush it, skip the covering, or blast connectors with a close-range jet, and that is when people create problems. Here is the whole routine.
Step one: let it go cold
Everything starts with a cool engine. Not warm, cool. If you can rest your hand on the block, the manifold, and the covers without flinching, you are good. This usually means waiting at least an hour or two after driving, more on a hot day.
Two reasons this matters. First, degreaser flashes off a hot surface before it can break down grease, so you waste product and get a worse clean. Second, spraying cold water onto a hot metal component like an exhaust manifold risks thermal shock, which can crack it. Patience here costs you nothing and prevents the worst-case outcome. Go make a coffee.
Step two: cover the sensitive parts
This is the step that separates a safe detail from a gamble, and it is the one people skip because they are impatient. Grab sandwich bags, plastic wrap, and a few rubber bands, and cover anything you do not want water forced into.
- The air intake. Water in the intake is the one genuinely serious mistake, so bag it or cap it.
- The alternator. Soaking it directly can cause problems, so shield it.
- Exposed fuse boxes and relay boxes. If the lid is not fully sealed, bag it.
- The battery and its terminals. Keep water off the terminals to avoid corrosion.
- Any open or aftermarket electrical connectors that are not factory-sealed.
Modern factory connectors are sealed and generally fine, but there is no downside to covering, and a huge downside to not. For the full checklist of exactly what to bag and why, read what to cover in the engine bay before you spray a drop.
Step three: degrease
Lightly mist the bay with water first to knock off loose dust, then spray your degreaser across the greasy surfaces. Work top to bottom so runoff does not drip onto areas you have not cleaned yet. Get the covers, the hoses, the frame rails, and the grimy corners.
Then let it dwell. Give the degreaser a couple of minutes to break down the oily film, but do not let it dry on the surface, especially in sun. If it starts drying, mist it again. The dwell time is where the cleaning actually happens, so do not rush straight to scrubbing. The quality of your degreaser makes a real difference here, and we cover the ones that pull their weight in our ranked engine degreaser picks.
Step four: agitate
Now work the degreaser in with brushes. Use a stiffer brush on baked-on grime and softer, longer brushes for delicate plastics and the tight gaps around connectors and hoses. Let the brush and the chemical do the work, you are agitating, not scrubbing like you are angry at it.
Keep these brushes dedicated to the engine bay forever. Grease soaks into bristles and never fully rinses out, and you do not want to drag that onto your paint later. If you are pulling a bundle together, our engine bay detailing kit guide covers what brushes are actually worth owning.
Step five: rinse, gently
This is where people get nervous, and rightly so if they do it wrong. The rule is low pressure and distance. A gentle stream from a garden hose is perfect. If you use a pressure washer, back off to a wide fan tip and hold it well away, letting the water fall onto surfaces rather than blasting into them. Never aim a close-range jet directly at a connector or the covered areas.
The mistake is treating the bay like a muddy wheel arch. It is not. Low and far always beats close and hard. We go deeper on the specifics in is it safe to pressure wash an engine, and the short answer is yes, if you respect pressure and distance.
Step six: dry it out
Once the grime and degreaser are rinsed away, get the water out. Wipe down what you can reach with microfiber, then either let the bay air dry in the sun or, better, blow the water out of the crevices with a leaf blower, compressed air, or a dedicated dryer. Removing your plastic bags is the last thing you do, and only once the surrounding areas are dry so you do not drip into what you protected. A quick idle for a few minutes also helps warm things and evaporate trapped moisture, if you are comfortable running it.
Step seven: dress the plastics
The finishing touch. With everything cool and dry, wipe a thin coat of a water-based dressing onto the plastics, covers, and hoses, then buff off the excess. This brings the color back and leaves a clean satin finish instead of a chalky gray. Keep it off the belt and any friction surfaces. For the full method and the products I run, see the engine bay dressing guide.
How often to do it
For most people, once or twice a year is plenty. A garaged weekend car can go longer, while a daily driver on dusty or salted roads benefits from more frequent light cleaning. The trick is to not let grime bake on for years, because a quick wipe-down when you notice buildup keeps you from ever facing a heavy, miserable deep-clean.
The bottom line
A clean engine bay is one of the most satisfying details you can do, and it is far less scary than it looks once you respect the order. Cool, cover, degrease, agitate, rinse gently, dry, dress. Follow that sequence, keep your pressure low and your distance long, and never skip the covering step. Do that and you get a bay that looks factory-fresh with zero drama under the hood.
Recommended Products
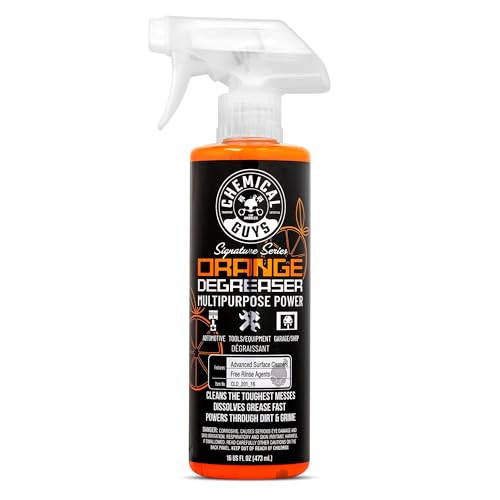
Best for most engine bays and general degreasing
- Citrus-based, cuts grease without harsh fumes
- Dilutable — one bottle stretches a long way
- Safe on painted metal, plastic and rubber
- Rinses clean without a greasy residue
Why buy it: the best balance of cutting power and safety — strong enough for a filthy bay, gentle enough to trust around your plastics and connectors.
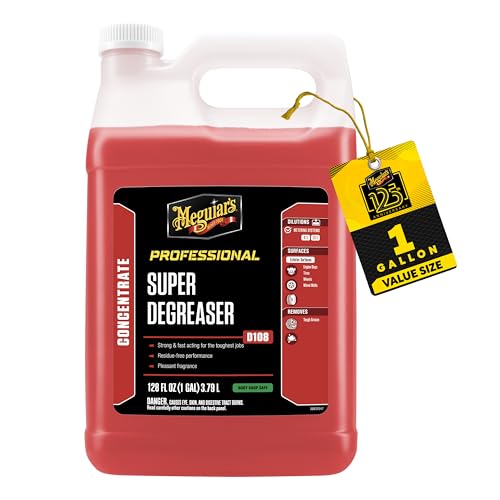
Best for dilutable pro-grade cleaning
- Highly concentrated — dilutes to taste
- Professional-strength on baked-on grime
- Versatile across the whole car
- Excellent cost-per-use once diluted
Why buy it: dilute it strong for a nasty bay or weak for general use — that flexibility makes one bottle do the work of several.

Best for one cleaner for the bay and everything else
- Non-toxic, biodegradable formula
- Dilutable for engine bays or household use
- Very widely available and inexpensive
- Low-fume and gentle on hands
Why buy it: the jack-of-all-trades — dilute it right and it degreases a bay perfectly, then cleans the rest of your garage too.

Best for neglected, filthy, years-of-grime bays
- Aggressive solvent-based cut
- Clings to vertical surfaces while it works
- Aerosol reaches tight spots easily
- The old-school standard for filthy engines
Why buy it: when a bay is genuinely filthy after years of neglect, nothing here shifts baked-on grease faster on that first deep clean.
Prices are pulled from Amazon and were accurate as of Aug 22, 2026, 6:54 PM EDT. Product prices and availability are subject to change — the live price is shown on Amazon.