
Affiliate Disclosure
Some links on this page are affiliate links. As an Amazon Associate, we earn from qualifying purchases — at no extra cost to you. We do not buy, test, or physically handle the products we cover; our rankings come from aggregated owner reviews, ratings and expert consensus. Commissions never change our verdicts. How we rank & full disclosure.
Short version: Wet-sanding is how you physically remove real headlight oxidation. Keep everything soaking wet, start with the coarsest grit the damage needs (400 for heavy, 600 for moderate), and step up through 800/1000, 1500 and 2000 without skipping any. Change sanding direction with each grit so you can see the old scratches disappear. Uniform frost means you're done at that stage.
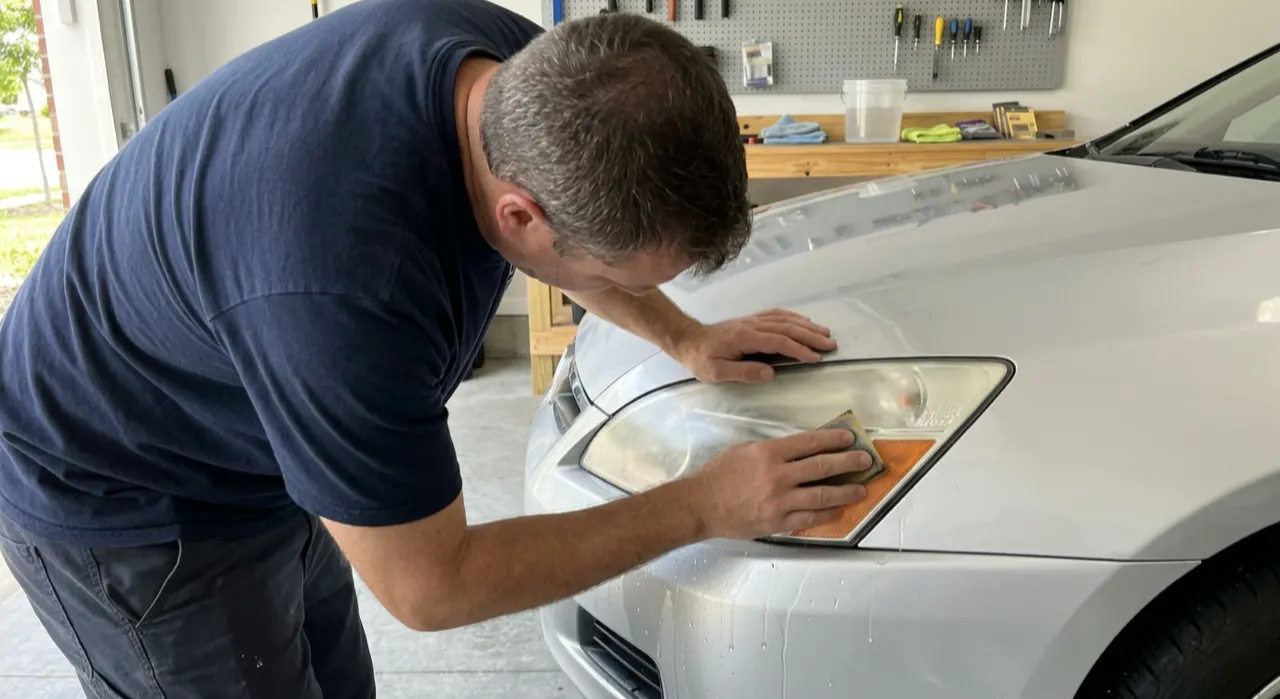
When a headlight has gone properly yellow, no polish on earth will fix it, because the damage is a layer of oxidized plastic that has to be physically removed. That means sanding. It sounds scary — you're taking sandpaper to your car — but done right it's controlled, safe and the single most effective step in the whole restoration. Here's exactly how to do it without wrecking anything.
When you actually need to sand
Not every foggy lens needs sandpaper. Run your fingernail across it. If it feels smooth and only looks lightly cloudy, you may get away with compound and a polish alone — that's the easy path in the full restoration guide. But if the surface feels rough, chalky or catches your nail, or the yellowing is deep, you're into sanding territory. That oxidation is baked into the plastic and only abrasion removes it. If you want the background on why the plastic degrades like this, we cover it in why headlights fog up.
Wet-sanding, and why the water matters
The "wet" in wet-sanding isn't optional — it's the whole technique. The water does three jobs at once: it lubricates the paper so it glides instead of grabbing, it floats away the fine plastic slurry so the grit doesn't clog, and it keeps friction heat down so you don't melt or gouge the polycarbonate.
So before you touch the lens: fill a spray bottle with clean water (a single drop of car soap helps the paper slip), soak your sandpaper for a minute, and keep spraying the lens constantly as you work. If the paper ever starts to drag or squeak, it's too dry — stop and re-wet. Dry-sanding, even for a few seconds, leaves deep uneven scratches that ruin the finish.
The grit progression
This is the part people get wrong, so read it twice. You start coarse to remove damage fast, then step up through progressively finer grits, and each grit must remove the scratches left by the one before it. A typical progression:
- Start: 400 grit for heavy oxidation, or 600 grit for moderate. (The very worst, rough lenses might begin at 320.) This does the real cutting — removing the yellow layer.
- Then 800 or 1000 grit to erase the coarse scratches from step one.
- Then 1500 grit to refine further.
- Finally 2000 grit to leave a fine, uniform frost that polishes up clear.
Never skip a grit. Jumping from 600 to 2000 feels faster, but the fine paper can't remove the deep 600-grit scratches, so you're left with sanding lines that no compound will polish out. Every skipped step costs you far more time later than it saved. This is the number-one mistake in the whole restoration — patience through the grits is everything.
The cross-hatch technique
Here's the pro trick that makes the progression foolproof. Sand each grit in one consistent direction — say, left to right in straight, even, overlapping strokes. Then when you switch to the next finer grit, sand at ninety degrees to the last — top to bottom. Now the scratch pattern is crossing the previous one, so it's obvious when the old direction of scratches has vanished. When you can no longer see the previous grit's lines, that stage is done.
Use even, moderate pressure. You're not muscling it — let the grit do the work and keep it wet. Cover the whole lens uniformly. Any glossy or clear patch you leave behind is un-sanded oxidation that'll show through your final polish.
Knowing when each stage is finished
After your first coarse grit, the entire lens should look evenly, uniformly frosted — a consistent milky white with no shiny survivors. That uniform frost is the goal at every stage; only the fineness of it changes as you climb the grits. By the time you finish 2000, the frost should be so fine and even that it almost looks satin. That's your cue to move on to compounding.
What comes after sanding
Sanding gets you to a uniform frost — it does not, on its own, give you a clear lens. The clarity comes back in the next stages: compound and polish cut that fine frost down to optical clarity, then you seal it. Do not stop at sanding thinking you're nearly there and just wipe it — you'll have a dull lens. And whatever you do, don't skip the seal at the end; sanding removes the last of the UV coating, so bare plastic will re-yellow fast without it. We explain why that final step is critical in sealing headlights so they stay clear.
Want it faster? Use a drill
Hand-sanding works perfectly but takes time and effort. If you'd rather speed things up and get a more even result with less fatigue, drill-attachment sanding discs step through similar grits mechanically. They're especially worth it if you're doing more than one car. We cover the options in drill-attachment kits. The same rules apply though — keep it wet, and don't skip grits.
That's wet-sanding demystified. Keep it wet, start coarse enough to remove the damage, climb the grits without skipping, cross-hatch so you can see your progress, and finish at a uniform fine frost. Get the sanding right and the rest of the restoration is easy — this is the stage that decides whether your headlights come out crystal clear or quietly hazy.
Recommended Products
Best for a complete sand-clarify-seal result
- 3-stage sand, clarify & seal
- UV sealing wipe included
- Does both headlights
- Proven lasting results
Why buy it: the only common kit with a proper UV seal step — which is the exact stage this guide warns you not to skip after sanding, so the lens does not re-yellow.

Best for fast, even drill-powered sanding
- Uses your drill for speed
- Sanding discs + compound
- Very even finish
- Steps through grits mechanically
Why buy it: the faster route mentioned in the drill section — sanding discs step through the grits with less fatigue and a more even frost.

Best for badly yellowed, deeply oxidized lenses
- Aggressive cut for bad haze
- Multiple sanding grits included
- Trusted brand
- Coarse-to-fine progression
Why buy it: the extra cut and coarser grits you need when the oxidation is heavy enough to start at 400 or 320, exactly the case this guide describes.
Best for the most durable re-yellowing protection
- Ceramic coating finish
- Wipe-on protective top-coat
- Strong UV durability
- Resists re-yellowing
Why buy it: a ceramic top-coat that resists re-yellowing longer than most — worth pairing with your sanding job since bare sanded plastic has no UV coating left.
Prices are pulled from Amazon and were accurate as of Aug 22, 2026, 6:54 PM EDT. Product prices and availability are subject to change — the live price is shown on Amazon.