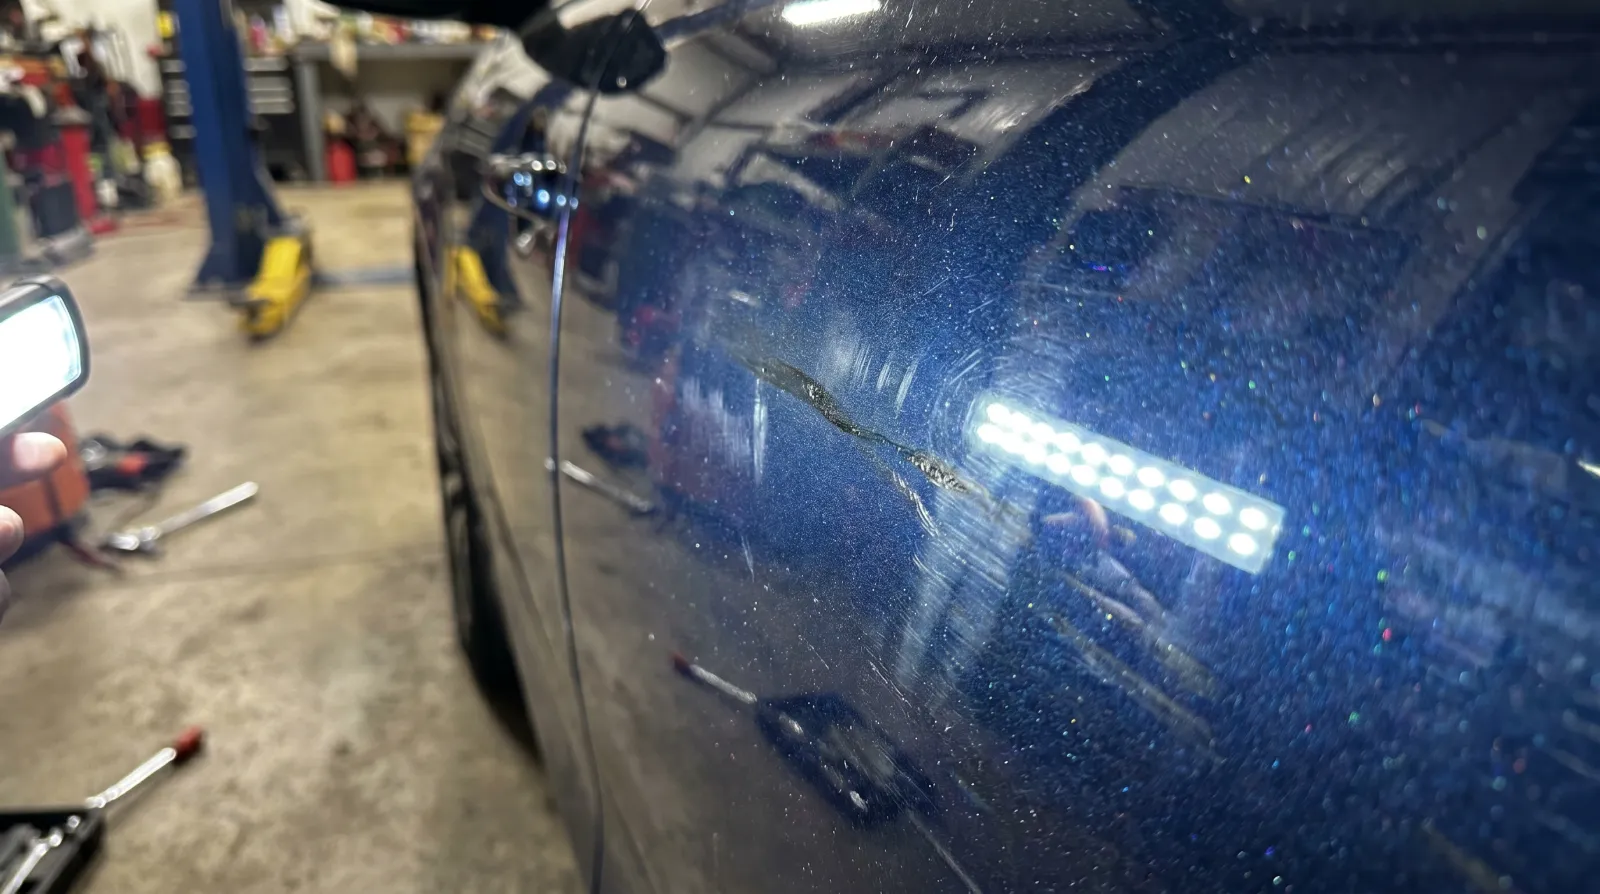
You spent the better part of a Saturday prepping, polishing, and laying down a ceramic coating you paid good money for. Then you hit the panel with a detailing light and see it — a rainbow smear, a dull haze, a streak that catches the light at every angle. That's a high spot, and it's one of the most demoralising things that can happen to a first-time ceramic coater.
The good news: high spots are fixable. The better news: they're entirely preventable once you know what causes them. This page is your full breakdown — causes, spotting, fixing, and the other common mistakes that trip up beginners. For the full application walkthrough, see our ceramic coating how-to guide, and check the curing time page before you touch anything post-application.
What Is a Ceramic Coating High Spot?
A high spot is an area where the coating has pooled, dried unevenly, or cured before it was properly levelled. The result is a raised film of coating sitting on top of the paint rather than bonding flush with it. Under direct light — especially an LED detailing light or bright sunlight — it shows up as a streak, smear, rainbow iridescence or flat dull patch. The coating itself is not damaged. What you're seeing is product that hasn't bonded correctly because something went wrong during the levelling window — the short period between application and when the coating starts to flash off and harden.
What Causes High Spots?
Over-Application — Too Much Product
Ceramic coating is not paint. You don't need a heavy coat. Most consumer coatings require 3–5 drops on a suede or foam applicator for a panel the size of a car door. Put on too much and the excess has nowhere to go — it pools in low spots, stacks on edges, and flashes off in thick layers that won't level flat no matter how long you buff. Less is genuinely more. If your applicator feels wet and loaded, you've already over-applied.
Not Buffing Within the Working Window
Every coating has a flash-off time — the window between application and when it starts to cross-link and harden, typically 1 to 5 minutes. Miss it and the coating has partially cured on the surface; buffing then smears it into a hazy streak rather than levelling cleanly. Work one panel at a time: apply, level, move on. Never coat an entire car and then go back to buff — the first panels will already be setting.
Applying in Direct Sunlight or High Heat
Heat accelerates flash-off. What would give four minutes of working time on a cool panel might give 60 seconds on a panel in direct sun. Always work in the shade or indoors — panel temperature matters more than air temperature. If you can't hold your hand flat against a panel for three seconds without discomfort, it's too hot to coat.
High Humidity
At the other extreme, very high humidity can cause some coatings to cure too fast or produce a hazy blush. Water vapour reacts with the coating during cross-linking. Ideal conditions are generally 40–60% relative humidity — check the product spec sheet, as some coatings handle humidity better than others.
Skipping the IPA Wipe-Down
An IPA panel wipe is not optional. It removes polish residue, panel-wipe oils, dust and fingerprints. Coat over contamination and the product bonds to the contamination rather than the clear coat — the result is uneven adhesion, streaky levelling and high spots that seem to reappear even after buffing. Use a 70–80% IPA solution, two clean microfibres in a cross-fold pattern, one panel at a time, and coat immediately after the IPA evaporates. (Full detail in our paint prep guide.)
How to Spot High Spots Under Light
High spots are easy to miss in low or diffuse light. You need a focused, high-intensity source to find them before they fully cure — a dedicated detailing inspection light or a shop-quality LED torch. After applying and initially buffing each panel, do a quick pass with the light at a low, raking angle. High spots appear as:
- Rainbow or iridescent smears, often with a wavy, oil-slick look
- Dull, hazy patches that don't reflect the light cleanly
- Streaks running in the direction you buffed
- Bright, cloudy areas on dark paint that look almost like water marks
Do this within your working window, ideally before moving to the next panel. Catching a high spot while the coating is fresh is the difference between a 30-second fix and a half-hour correction.
How to Fix Fresh High Spots (Before Full Cure)
If you catch a high spot while the coating is still flashing off — typically within the first few minutes — the fix is straightforward. Take a clean, slightly damp microfibre (not soaking, just a light mist of distilled water) and buff the area gently in straight, overlapping passes. The moisture softens the partially cured coating just enough to level. Follow immediately with a dry, clean microfibre, then check with your light. A few rules: use a fresh clean microfibre; work quickly but not frantically (circular scrubbing creates new marks); and don't flood the panel — one or two light spritzes on the cloth is enough.
How to Fix Cured High Spots (24+ Hours After Application)
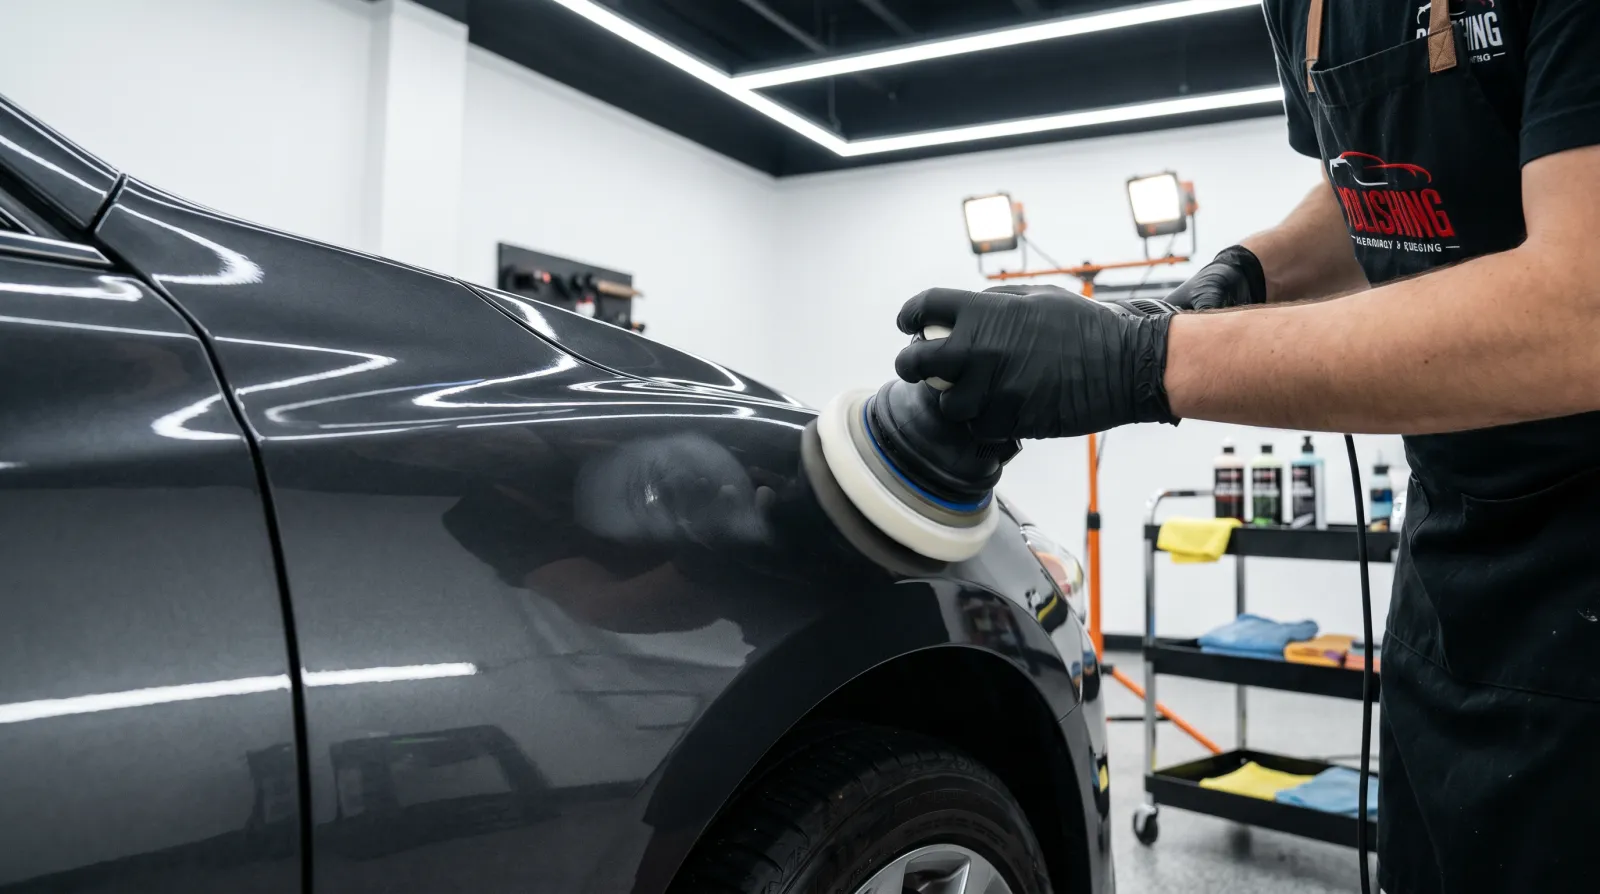
Once the coating has fully cross-linked — generally after 24 hours, some need 48–72 — a damp microfibre won't cut it. You're now dealing with hardened ceramic that needs mechanical levelling. The standard fix is a light machine polish with a soft foam pad and a finishing polish:
- Identify all affected areas under your inspection light and mark them with masking tape at the panel edge.
- Use a dual-action polisher (DA), or a careful hand spot-treatment for small, accessible areas.
- Work with a soft finishing pad and a finishing polish — not a compound. You're removing a thin ceramic film, not heavy defects.
- Check regularly with your light. Stop as soon as the high spot is gone.
- IPA wipe the corrected area thoroughly.
- Re-apply the coating to that section, one panel at a time, levelling within the working window.
On very fresh cures (under 12 hours) some detailers use a coating-safe high-spot remover before reaching for a polisher — check whether your manufacturer offers one.
Other Common Mistakes Beginners Make
Dust Contamination During Application
Any dust that settles on a wet panel is encapsulated under the product as it cures — small bumps, gritty texture, or specs locked into the surface. Work in a clean environment with doors closed, hose down the floor before you begin, and avoid any work near polishing or sanding.
Wrong Ambient Temperature
Most coatings have a stated application range, typically 10°C to 30°C. Below it, the coating takes too long to flash and may not bond; above it, the flash time shortens dangerously. Check the spec sheet, not just the bottle.
Washing Too Soon After Application
The coating may feel dry within hours but is still cross-linking. Most specify a minimum 24–48 hours before any water contact, with a full wash not recommended until 7 days. Rain exposure during this window is also a concern — see our curing time guide for the full timeline.
Skipping Proper Decontamination
Ceramic coating locks in whatever is on your paint at application time — bonded iron, tar, water spots and micro-marring all get preserved. The correct sequence is wash, decontamination (iron remover, tar remover, clay bar), correction if needed, IPA wipe, then coat. Skip a step and you're sealing in problems.
Not Reading the Product Data Sheet
Consumer coatings are not all the same — flash times, methods, humidity tolerances and cure schedules vary. A method that works for one brand may produce high spots with another. Read the full data sheet before you open the bottle.
Prevention Checklist
Run through this before every application. Two minutes here saves hours of correction:
- Work indoors or in deep shade with no direct sun on panels
- Ambient temperature 10–30°C — check the product spec
- Relative humidity 40–60% — use a hygrometer if unsure
- Panel cool to the touch — test with your hand
- IPA wipe completed immediately before coating, one panel at a time
- Applicator loaded with the correct amount — 3–5 drops maximum
- Timer set for your coating's specific flash time
- Two clean folded microfibres per panel for levelling — never reuse a dirty cloth
- Inspection light ready to check each panel before moving on
- Doors and windows closed to prevent dust and airflow
- Weather checked — no rain expected for 24–48 hours
For the complete process from prep to final inspection, return to our ceramic coating hub or go straight to the step-by-step application guide.
Affiliate Disclosure
Some links on this page are affiliate links. If you buy through them we may earn a small commission at no extra cost to you. It never changes our verdicts — we only recommend gear we would run on our own cars. Read the full disclosure.