Most workshop injuries happen not during the lift but in the minutes before it — on uneven ground, without chocks, with a jack standing in as a support. This page exists to close that gap. It covers wheel chocks (what they do, which type, exactly where to put them), every other safety step that has to happen before you slide under, and a blunt checklist you can run through every single time. It sits inside our broader jacking up a car hub, which covers the full process from trolley jack selection to lowering safely.
One rule underpins everything on this page: a jack lifts a car; it does not hold one. If you are going under the car for any reason — oil drain, brake caliper, exhaust, a quick look — the load must be on rated jack stands before your body goes anywhere near the underside.
Do You Actually Need Wheel Chocks?
Yes. Every time. A car on a jack is sitting on a tiny contact patch at the saddle and on three tyres. Even with the parking brake applied and the transmission in Park, the grounded wheels can still creep if there is any incline, if the floor surface is slightly greasy, or if the jack shifts the car laterally as it rises. A rolling car on a single hydraulic jack is a fast and unrecoverable situation.
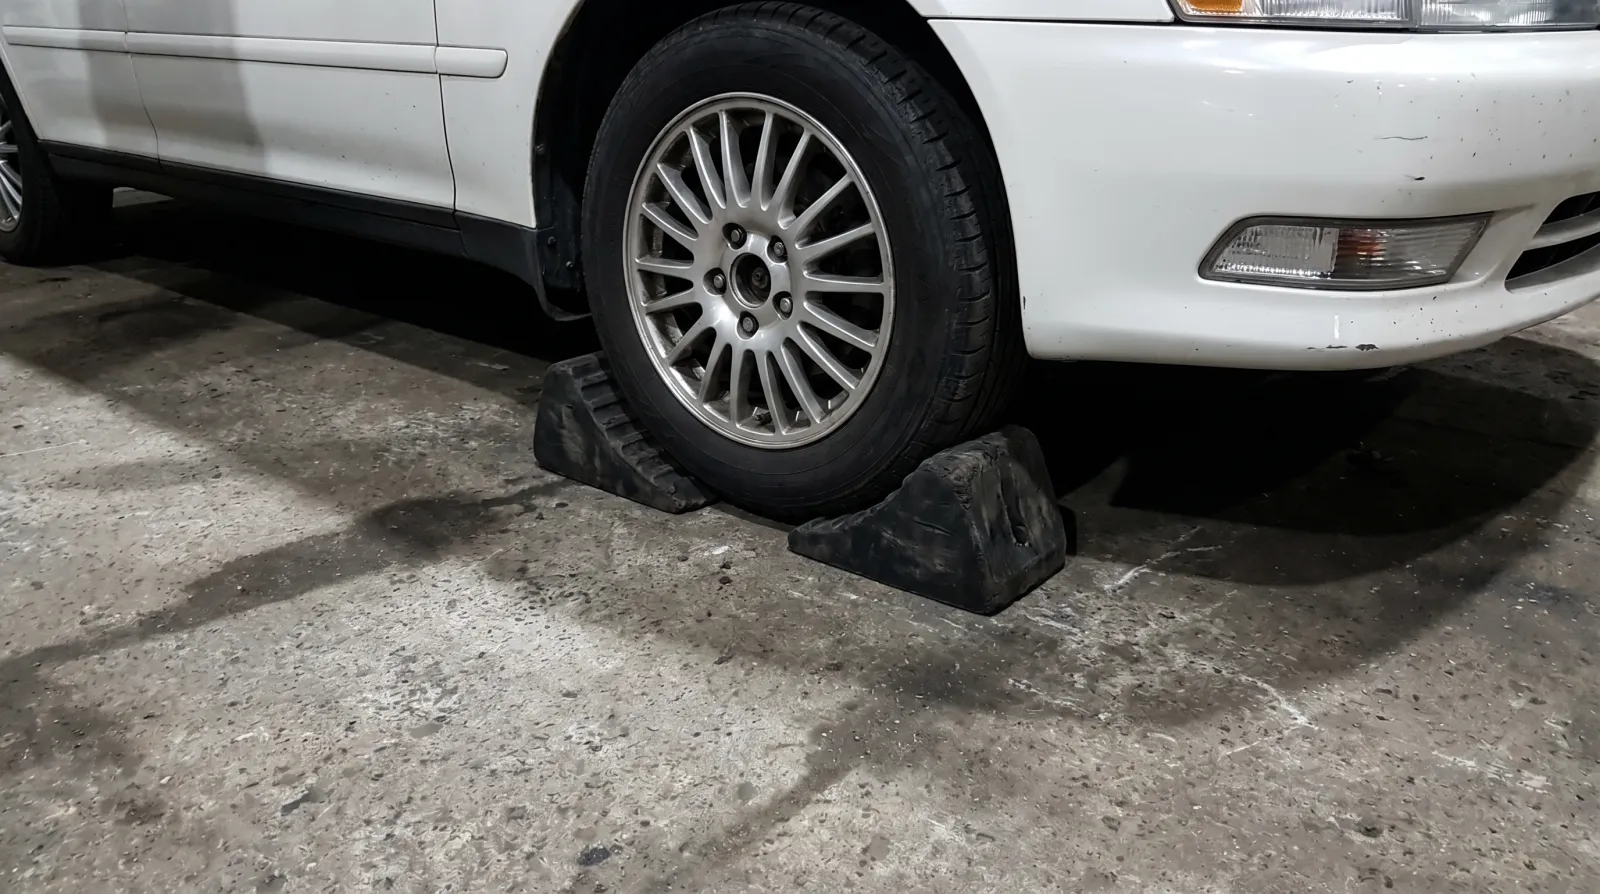
Wheel chocks are wedge-shaped blocks — typically triangular in cross-section — placed tight against the tyre on both sides of a wheel at the grounded end of the car. If you are lifting the front, the chocks go against the rear tyres. If you are lifting the rear, they go against the front tyres. That last part matters: chock the end that stays on the ground, not the end you are lifting.
They cost almost nothing. A pair of rubber chocks from a decent auto shop runs between ten and twenty dollars. Given what they are protecting against, that is an unreasonable deal in your favour. If you want a quick comparison of rated options, see our wheel chock comparison guide.
Rubber vs Plastic Wheel Chocks: Which to Buy
Rubber chocks are the better choice for home garage use. They grip concrete reliably, they flex slightly to conform to the tyre profile, and they do not crack or shatter in cold weather. Look for solid moulded rubber, not hollow plastic dressed up in a rubber coating. The weight is a good indicator — a quality rubber chock feels dense and substantial.
Plastic chocks are lighter and cost less, but they can skate on smooth concrete, especially if the floor has any oil residue, and they become brittle in sub-zero temperatures. If you use plastic chocks, make sure they are rated and that you are placing them on a clean, dry surface. Cheap plastic chocks from a discount bin are not the place to save money.
Either type should be rated to well above the axle weight you are working with. The rating is usually printed or moulded into the chock body. If there is no rating, do not use it.
Correct Wheel Chock Placement
Place one chock tight against the front of the tyre and one tight against the rear of the tyre on the same wheel — both sides of each grounded wheel. The chock needs to be flush against the tread, not sitting a centimetre away. A gap means the tyre has to travel that distance before the chock does anything, and by then the jack may already have slipped.
For most jobs where you are lifting one end of the car, chock both wheels on the grounded axle: four chocks total, two per wheel. For a full four-corner lift, set chocks before you raise the first end, then once all four corners are on stands the chocks are redundant but do no harm staying in place.
Keep the chocks on the car until the car is fully back on the ground and the jack is removed. Pulling them out while the car is still on stands introduces unnecessary movement.
Parking Brake and Transmission
Apply the parking brake before you do anything else. On a car with a traditional handbrake cable, pull it fully to the stop. On electronic parking brakes, confirm the dashboard indicator is on before you proceed.
Leave a manual transmission in gear — first or reverse. Leave an automatic in Park. The transmission lock and the parking brake together add two independent mechanical barriers against movement. Chocks then add a third. You want all three, not just one.
Do not rely on the parking brake alone. Cables stretch, drums glaze, and electronic systems can theoretically disengage if you are working on the car's electrical system. The belt-and-braces approach costs nothing and protects everything.
Surface: Level Concrete Only
This is non-negotiable. The only surface you should be lifting a car on is level, solid concrete — a garage floor, a sealed workshop slab, or a level concrete driveway. If it is not concrete and it is not level, stop and find somewhere better before you start.
Never lift on grass. Grass compresses unevenly under load. The ground beneath it shifts as the weight increases. A jack or stand base that looks stable when you place it can sink, tilt, and topple the car with no warning.
Never lift on gravel or dirt. Loose aggregate spreads under point loads. Stand bases and jack legs punch through gravel and the car comes down.
Never lift on a slope. Even a gentle incline — less than you would normally notice walking on it — creates a lateral force component the moment the car is off its own tyres. Chocks and stands are designed for flat, not tilted, loads. A slope turns a controllable situation into one that is not.
If you are on asphalt in summer heat, be aware that asphalt softens. A wide flat board under each stand base and under the jack spreads the load, but asphalt is always second-best to concrete. If the asphalt is hot to the touch, find concrete or wait for a cooler time of day.
Minimum Two Jack Stands, at Rated Points
Once the car is lifted, it comes off the jack and onto jack stands before anything else happens. Two stands minimum for one-end lifts; four stands for a full-car lift. See our full breakdown in do you need jack stands if you are weighing up the options.
Stands go at rated support points — reinforced chassis rails, the subframe, or marked pinch-weld pads, as specified in your owner's manual for your specific car. These are the points the manufacturer has engineered to take a concentrated vertical load. Thin sheet metal, the oil sump, a control arm, or a random spot on the floor pan are not rated points, and placing a stand on any of them can punch through the metal or cause the stand to kick out sideways.
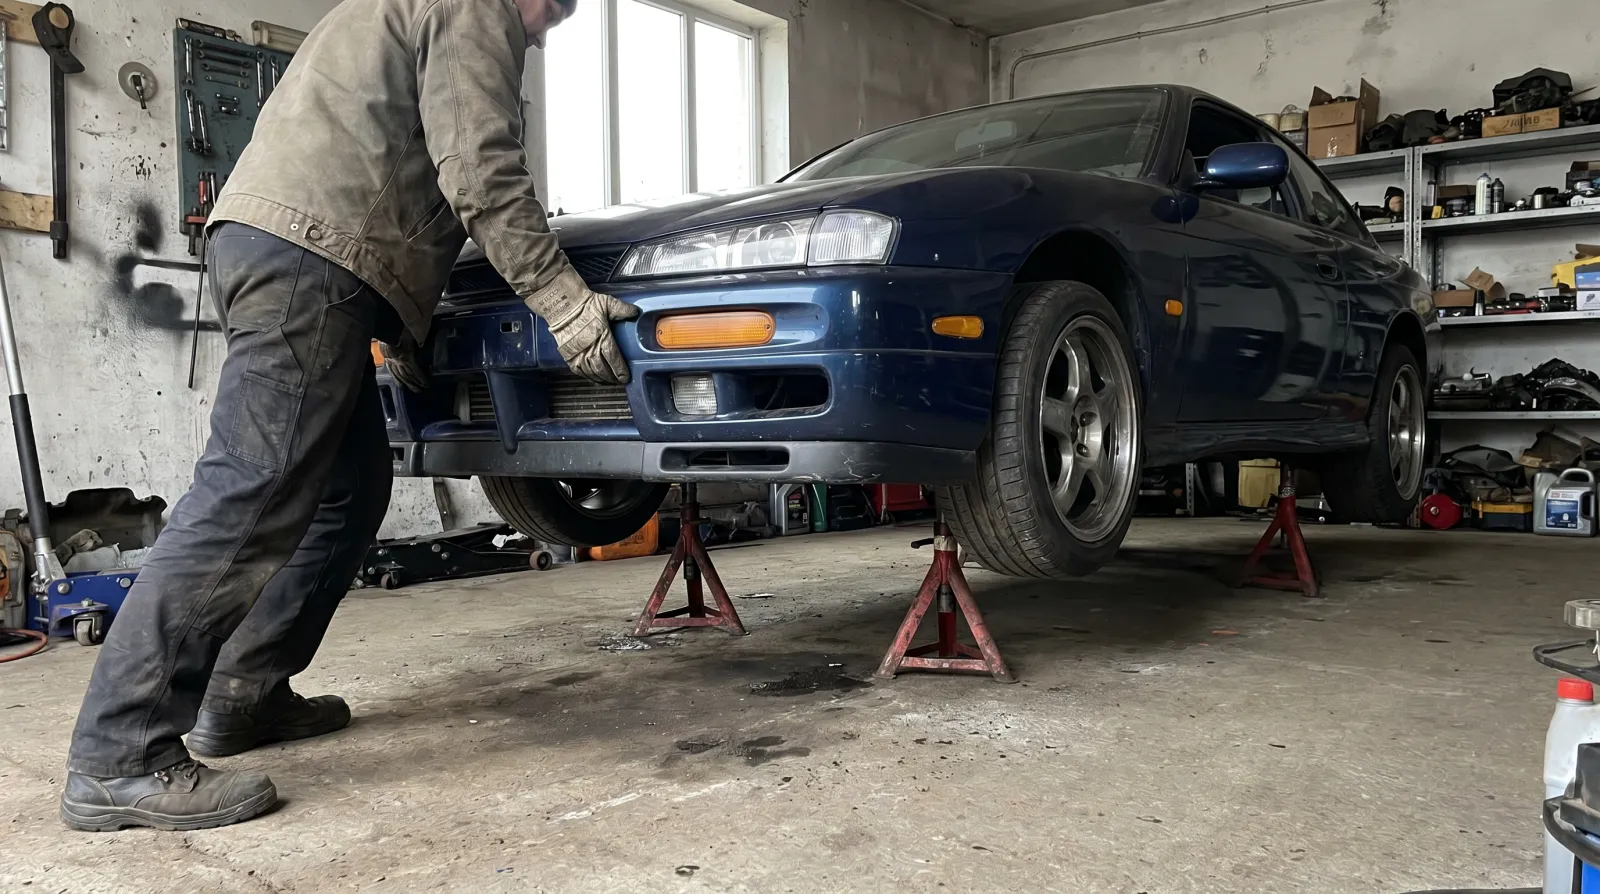
Set the stand to the correct height before the car comes down onto it. Lock the ratchet or engage the locking pin before you release the jack. Lower the car onto the stands slowly and evenly. Both stands should take load at the same time if you are working one end; an uneven load means one or both stands are not in the right position.
The jack stays lightly in contact after the load transfers to the stands — not bearing weight, but positioned as a last-resort catch. That is its only job at this point. If a stand fails, the jack is there. The stands are holding the car. The jack is not.
The Push and Wobble Test
Before you go under the car, stand next to it and shove it firmly from multiple directions — from the front, from the side, from the rear. Use your body weight, not a timid nudge. If the car rocks, shifts, creaks, or moves in any direction, it is not safe. Get it back on the jack, reposition the stands, and test again.
This is not optional and it is not paranoid. A car that moves when you push it at stand level will move when you put your weight against something underneath it while working. The push test reveals a misplaced stand, an unlocked ratchet, an uneven load distribution, or a soft floor patch — all of which are fixable before you are under there. Discovering them after the fact is a different outcome entirely.
If the car passes the push test, it is stable. If it does not, it is telling you something. Listen to it.
Why the Jack Itself Is Never a Support
Hydraulic jacks — floor (trolley) jacks and bottle jacks both — use a sealed fluid system to generate lift. Seals degrade, valves leak, and under a sustained static load a hydraulic jack will slowly drop. It may take minutes or it may take hours, but the direction of travel is always down. A jack that held a car yesterday may not hold it today, and there is no external indication that it is about to fail.
The factory scissor jack supplied with your car is a roadside tyre-change tool. It has a narrow base, minimal rated capacity, and no business being used as a workshop support. If you use a scissor jack to lift the car and leave it there while you work underneath, you are relying on a device that was not designed for sustained loads, on a narrow footprint, with no stands as backup. Do not do this.
The correct role for the jack is to lift the car to height and then transfer that load to rated jack stands. After that transfer, the jack is a standby device, not a primary support. For a step-by-step guide to the full process, see how to jack up a car.
Pre-Go-Under Safety Checklist
Run through this every time. Not most times. Every time. It takes less than two minutes and the alternative is not worth thinking about.
- Surface confirmed: level, solid concrete — not grass, gravel, dirt, or a slope.
- Parking brake applied: cable or electronic, confirmed on.
- Transmission secured: manual in gear (first or reverse); automatic in Park.
- Wheel chocks placed: both sides of both grounded wheels, tight against the tyre tread, correctly rated.
- Jack at a rated jack point: confirmed against owner's manual, saddle centred and stable.
- Car raised to working height without the lift height being more than needed for the job.
- Jack stands set to height at rated support points, ratchet or pin locked, bases flat on the ground.
- Car lowered onto both stands evenly; load confirmed transferred off the jack.
- Jack left lightly in contact as a backup — not bearing the load.
- Push and wobble test passed: firm shoves from front, side, and rear, no movement.
- Work area clear: no tools, rags, or drain pans positioned under the car near the entry point.
- Someone else knows you are under the car — or you have a means to call for help from underneath.
All twelve ticked? You are good to go under. Any one of them not ticked? Stay out until it is resolved. There is no job that is urgent enough to skip this list.
A Note on “Just a Quick Look”
The phrase “I'm only going under for a second” is responsible for a disproportionate share of workshop injuries. The time you plan to spend under the car has no bearing on what happens if the load shifts. A hydraulic seal does not check how long you intend to be under there before it fails. The push test takes thirty seconds. Placing proper stands takes two minutes. Neither of them becomes less important because your job is quick.
Do the checklist. Every time. Returning to the full process? The jacking up a car hub has everything in sequence.
Affiliate Disclosure
Some links on this page are affiliate links. If you buy through them we may earn a small commission at no extra cost to you. It never changes our verdicts — we only recommend gear we would run on our own cars. Read the full disclosure.